How To: Set Up a Team Hierarchy
Last updated: May 25, 2026
Summary
This article covers how to create and manage a team hierarchy in Hyperbound.
A hierarchy lets you nest sub-teams under parent teams to match your org structure; for example, AE and BD teams sitting under a Sales parent team.
If you haven't set up any teams yet, start here first: How to: Set Up Teams in Hyperbound
Prerequisites
Admin access required.
Manager hierarchy needs to be enabled for your workspace
Understanding the hierarchy
Teams in Hyperbound can be nested to any depth. Here's an example:
Your Organization
Sales
AE
BDR
CS
Key rules:
A team can have one parent and multiple sub-teams
Each user can belong to multiple teams, but for simplicity, it's recommended to have 1 team per user.
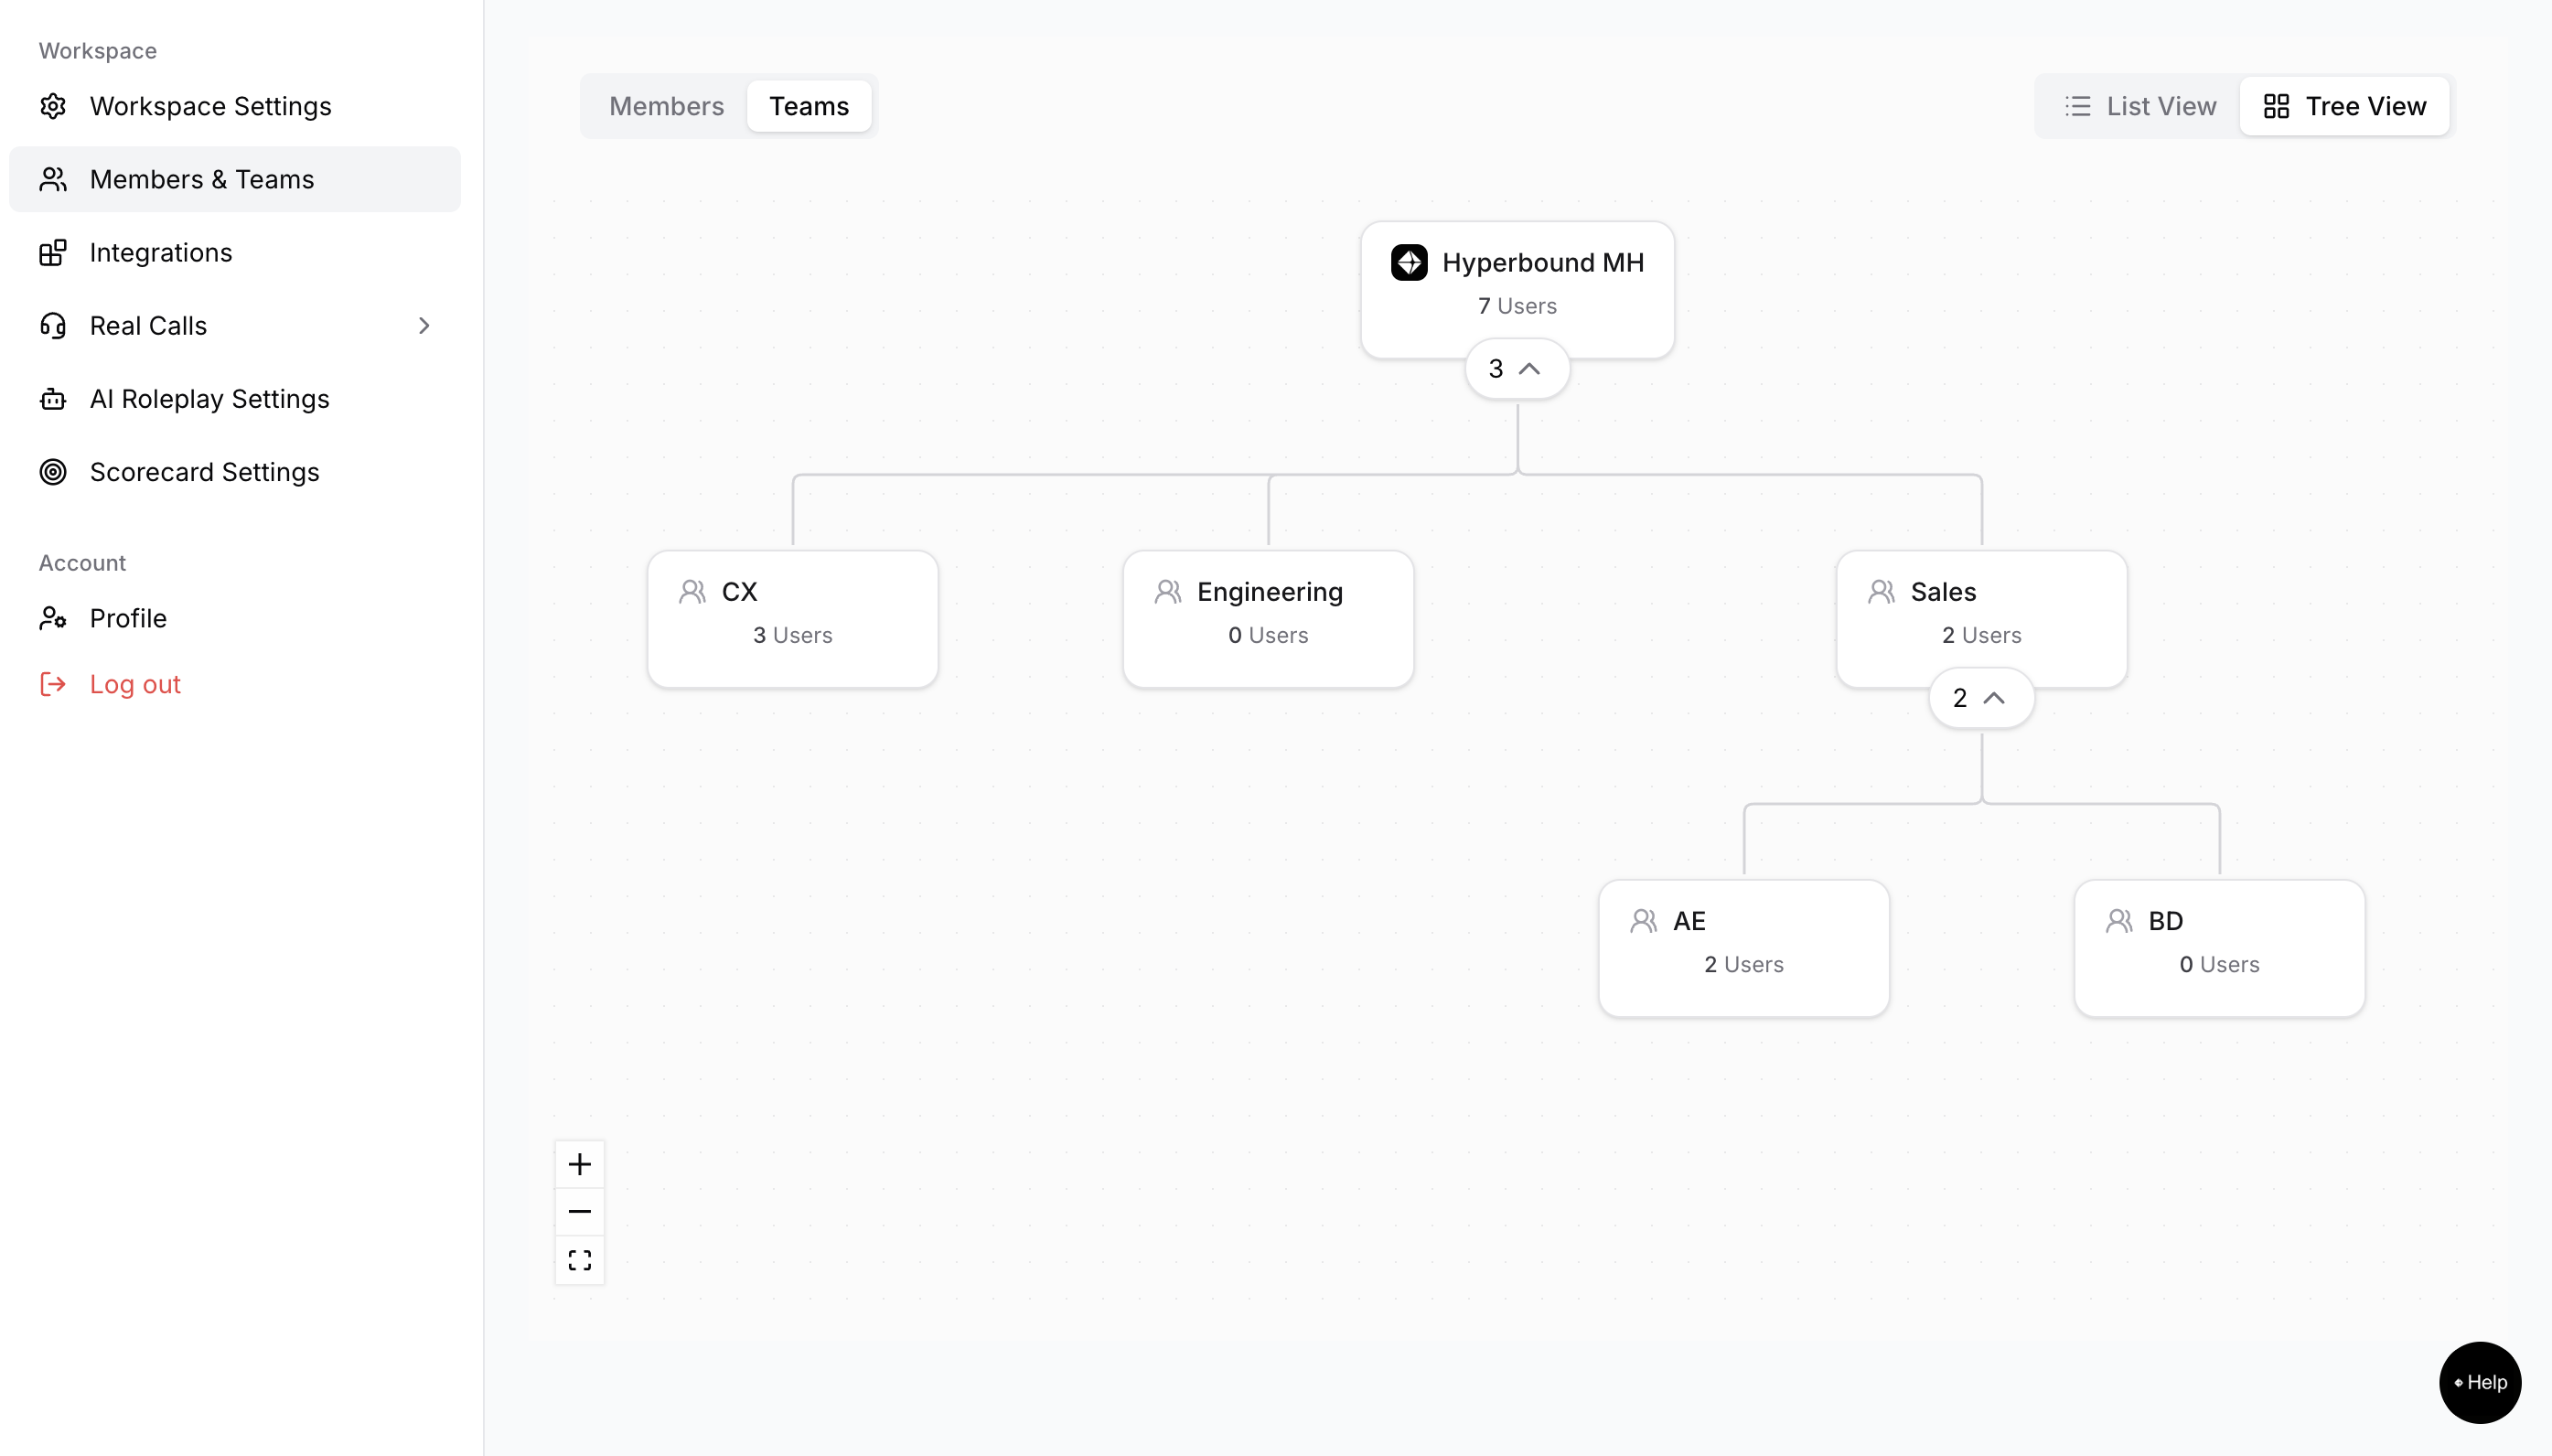
Step 1: Navigate to Teams
Log into Hyperbound as an admin
Click your company name in the bottom left
Select Manage and Invite Members
Go to the Teams tab
Step 2: Create a team
You can create teams two ways:
Option 1: From the Create Team button
Click Create Team
Enter a team name (e.g. "Sales" or "AE")
In the Parent Team picker, select a parent team if this is a sub-team (e.g. select "Sales" for the AE team). Leave it set to No parent if this is a root-level team.
Click Save
Note: Always create your top-level teams first, then add sub-teams underneath them.
Option 2: Inline from the hierarchy tree
Hover over any existing team row in the tree
Click Add sub-team (appears on hover, on the right side of the row)
The Create Team modal opens with the parent pre-filled
Enter the sub-team name and click Save
Step 3: Reorder the hierarchy
You can drag teams to reorder them or move them under a different parent.
Hover over any team row
Grab the six-dot drag handle on the right side of the row
Drag the team to its new position
Step 4: Assign users to teams
Once your hierarchy is set up, assign users to their teams.
For full instructions: How To: Assign Users to Teams
Important: Each user belongs to one team. The team they're on determines what data they can access based on your org's visibility settings.
Maintaining your hierarchy
To rename a team:
Go to the Teams tab
Hover over the team row
Click the pencil icon
To delete a team:
Go to the Teams tab
Hover over the team row
Click Delete
Note: Deleting a team does not delete its sub-teams. Sub-teams move to the root level.
Users will also have to be mapped to new team
For more detail: 📄 How To: Fix + Edit Existing Teams
What's next
Once your hierarchy is set up, configure what each role can see: 📄 How to: Configure Visibility Settings
Need help?
Reach out via the chat button or email support@hyperbound.ai.