How To: Add Custom Filters to the Deals Page
Last updated: July 28, 2026
Filter your deals by any CRM property, not just the built-in filters, so you can narrow down to exactly the deals you're looking for.
What it does
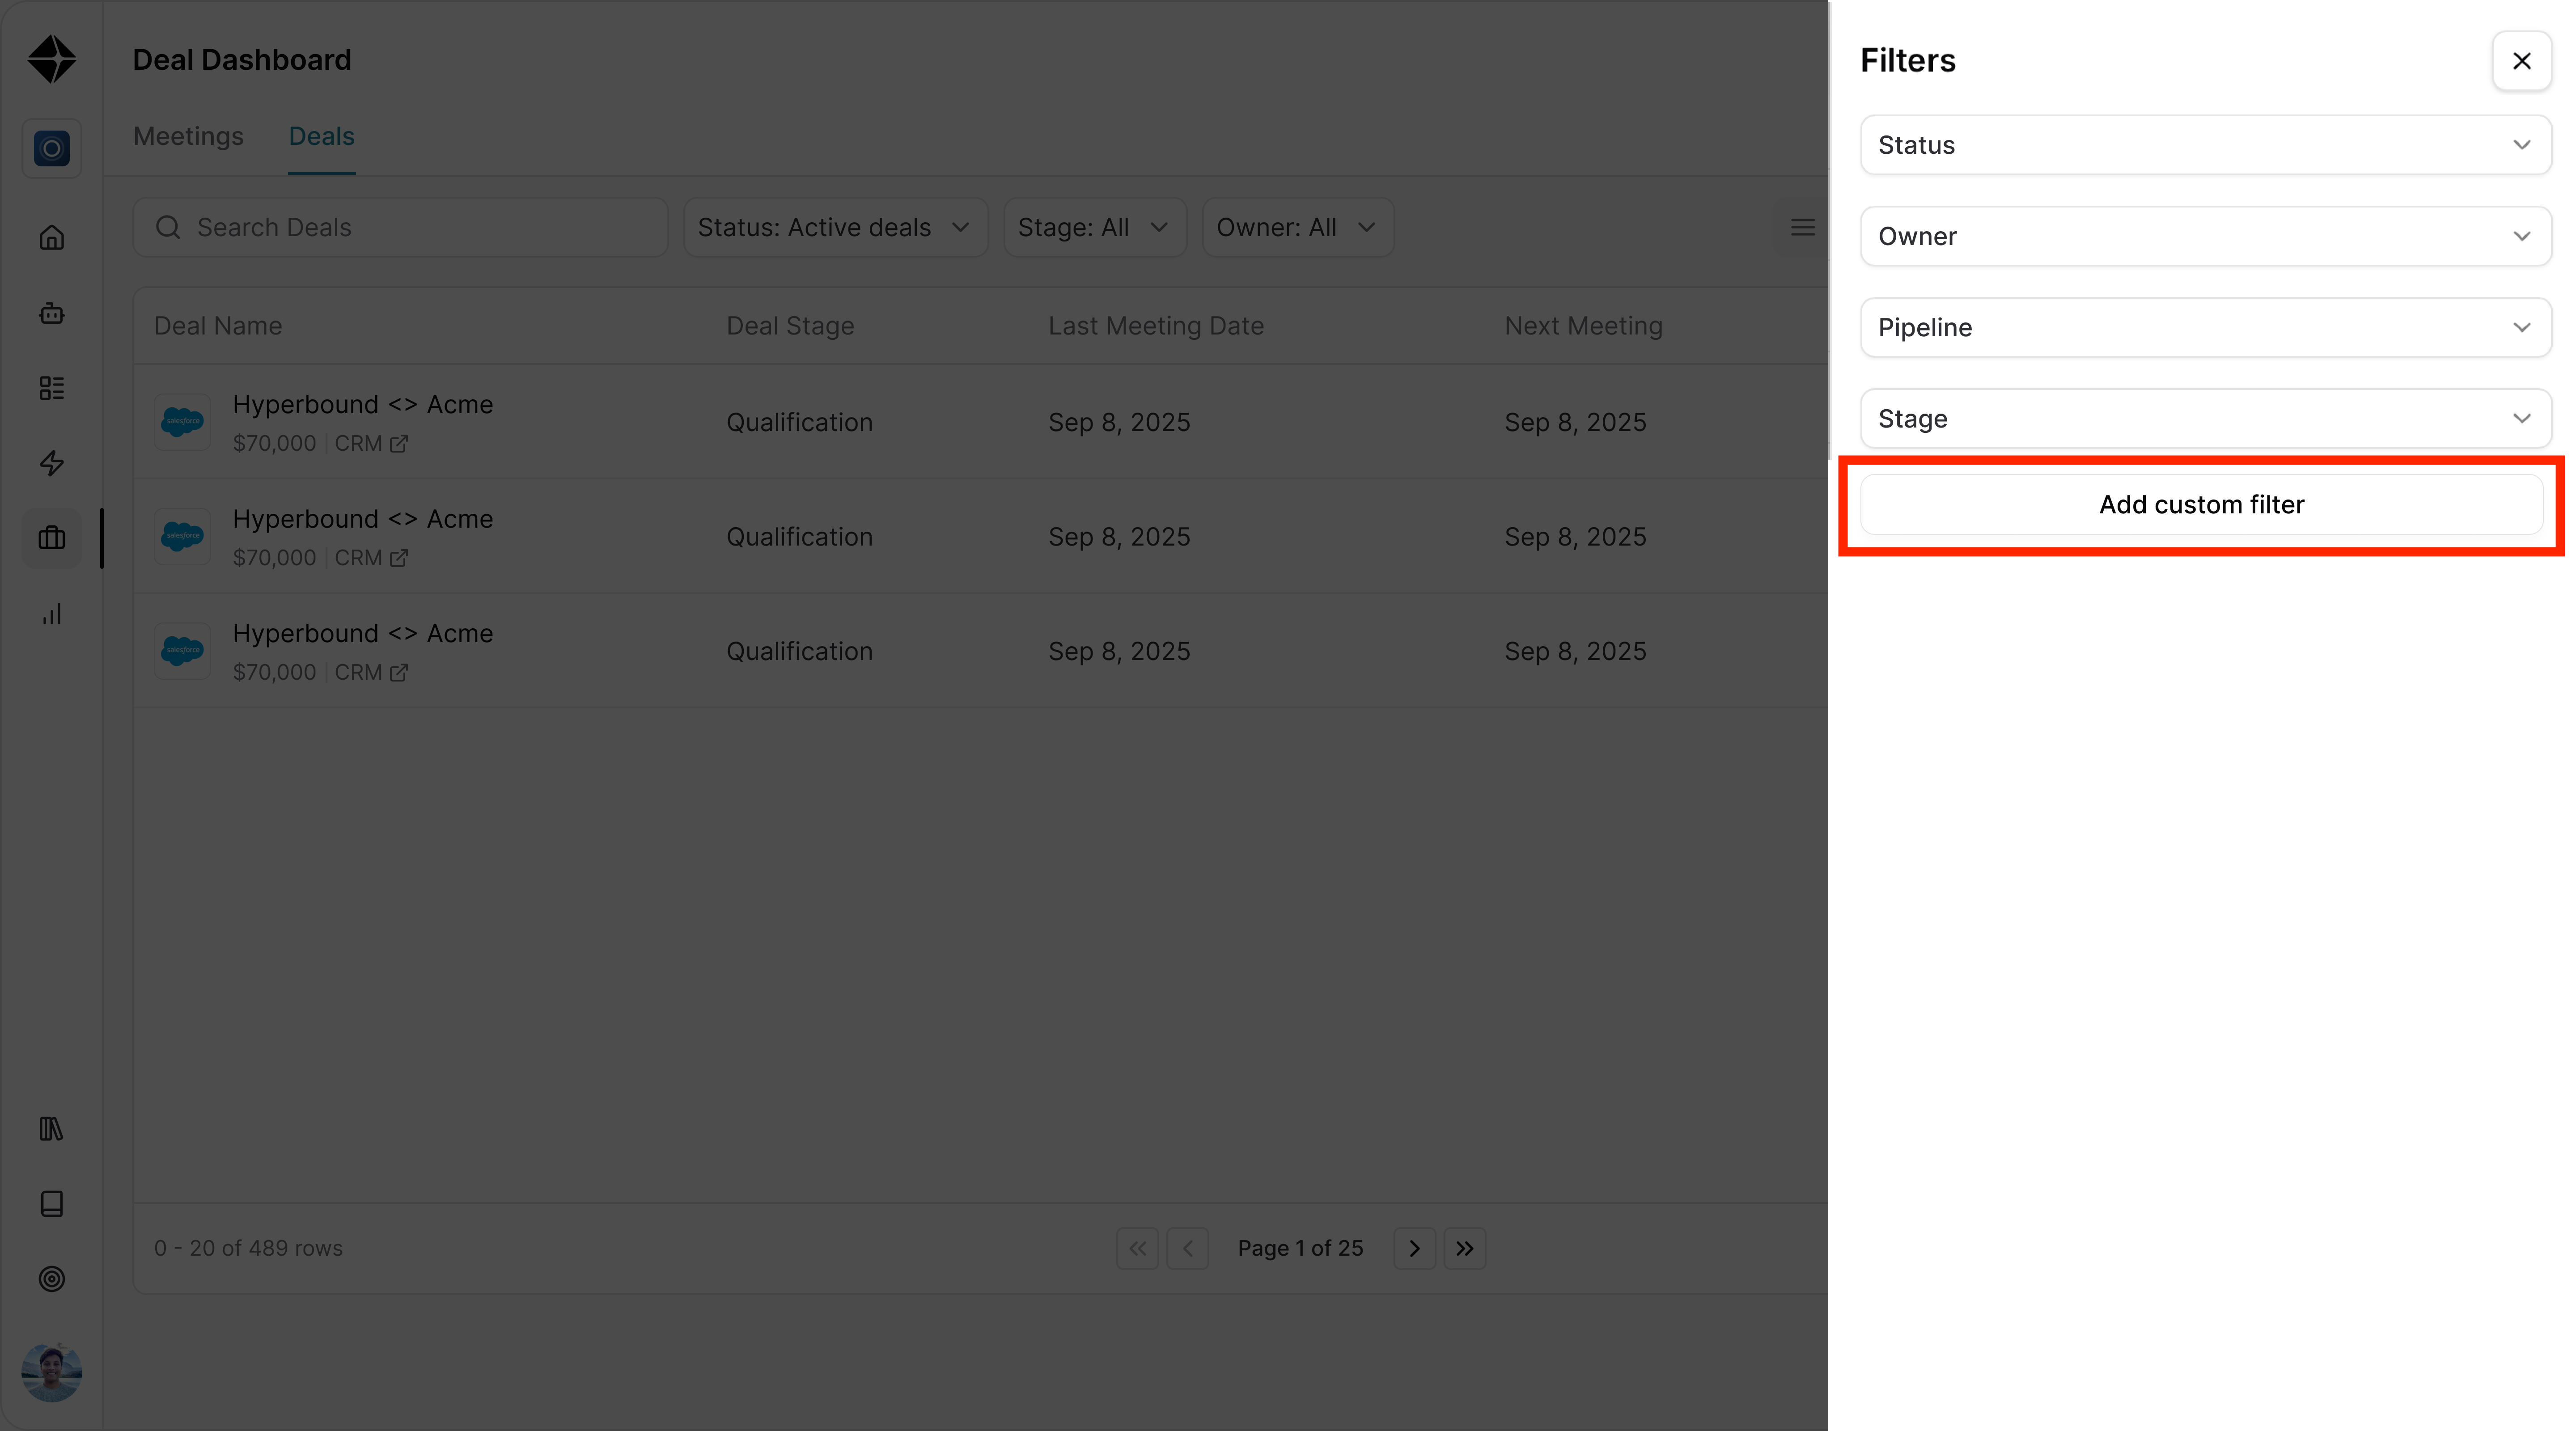
Filter by any CRM property — Go beyond the default filters (stage, owner, amount) and filter on any property synced from your CRM.
Add multiple filters — Stack as many custom filters as you need to narrow your view.
Filters save automatically — Your custom filters persist the next time you open the Deals page, so you don't have to rebuild them each session.
Adding a custom filter
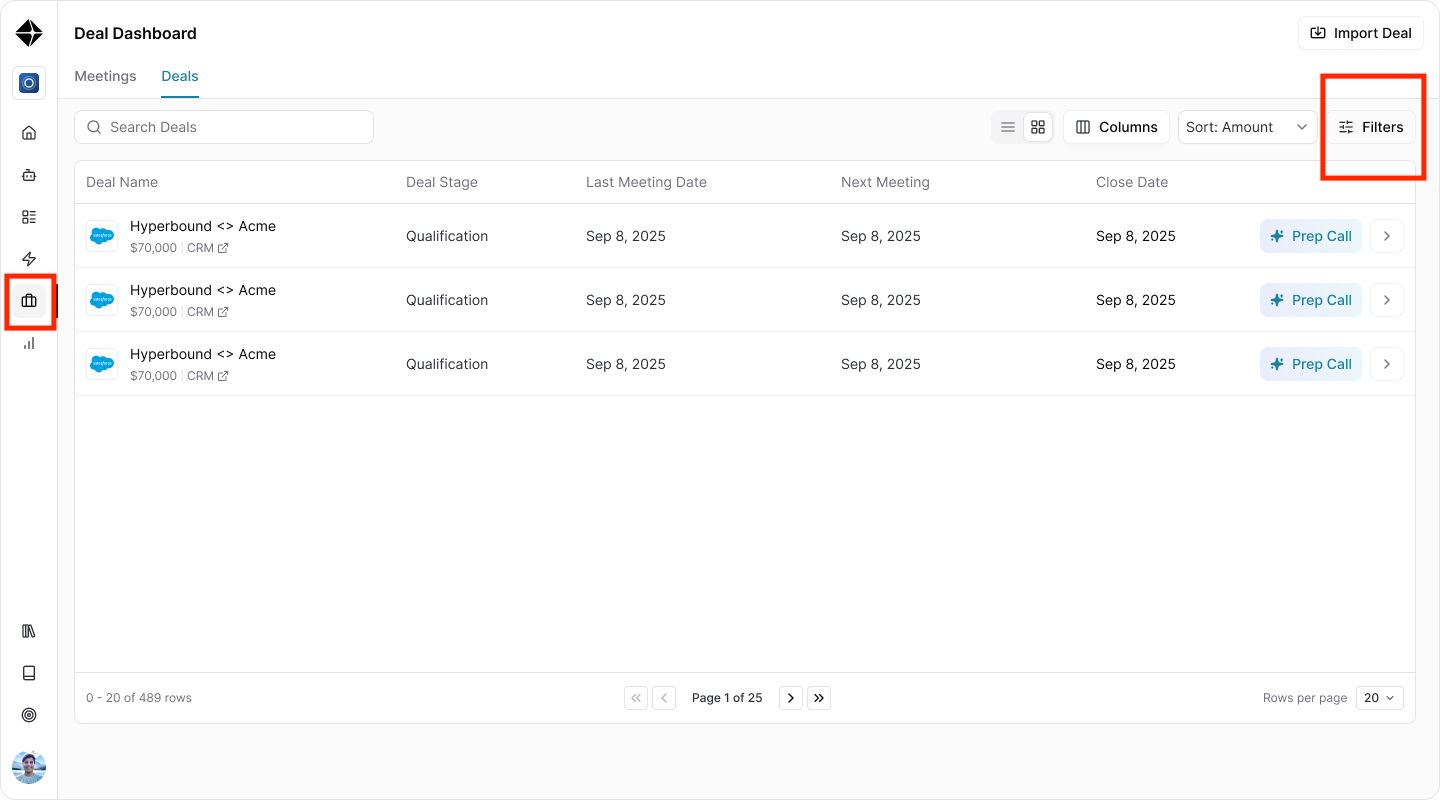
Go to Deals in the left-hand navigation.
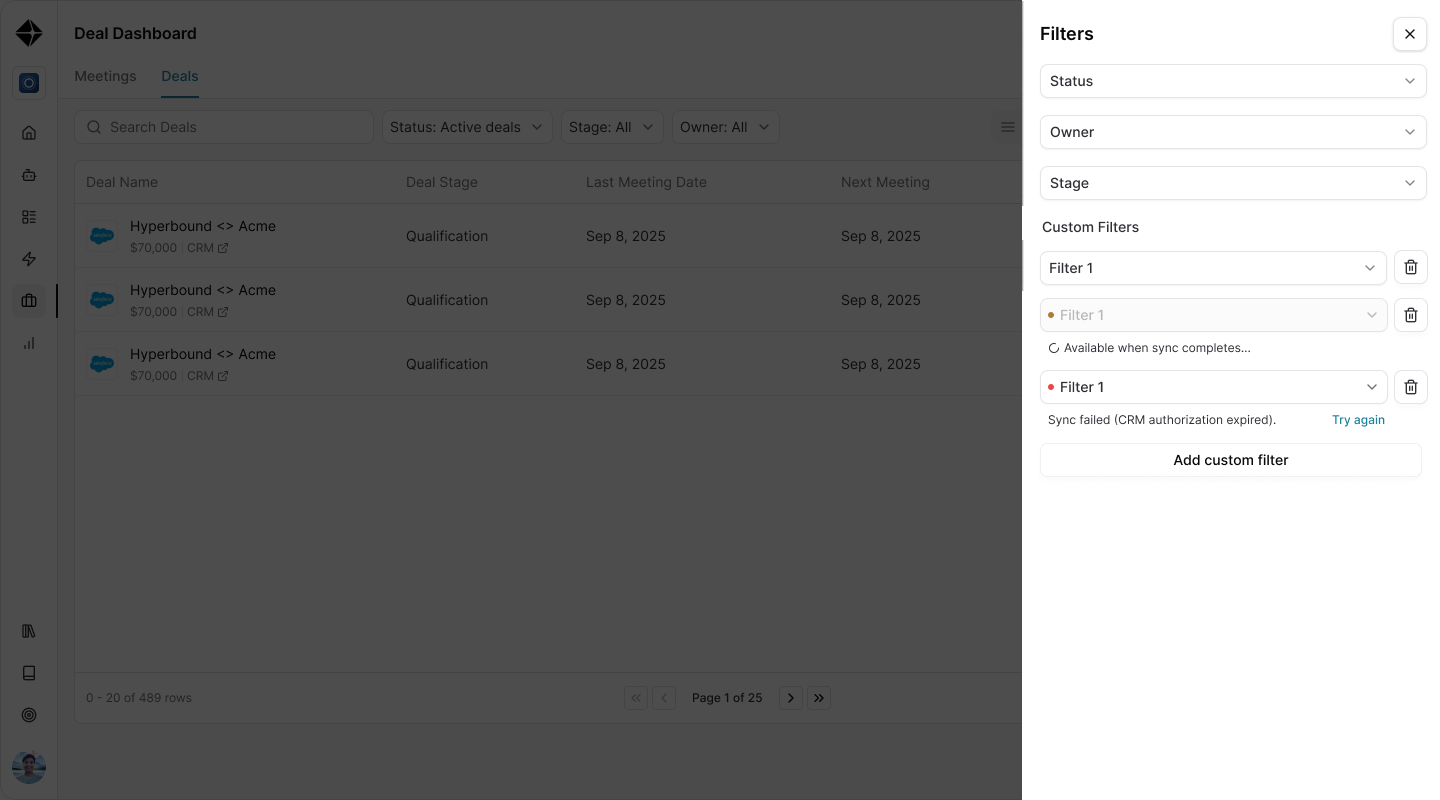
Click Add custom filter.
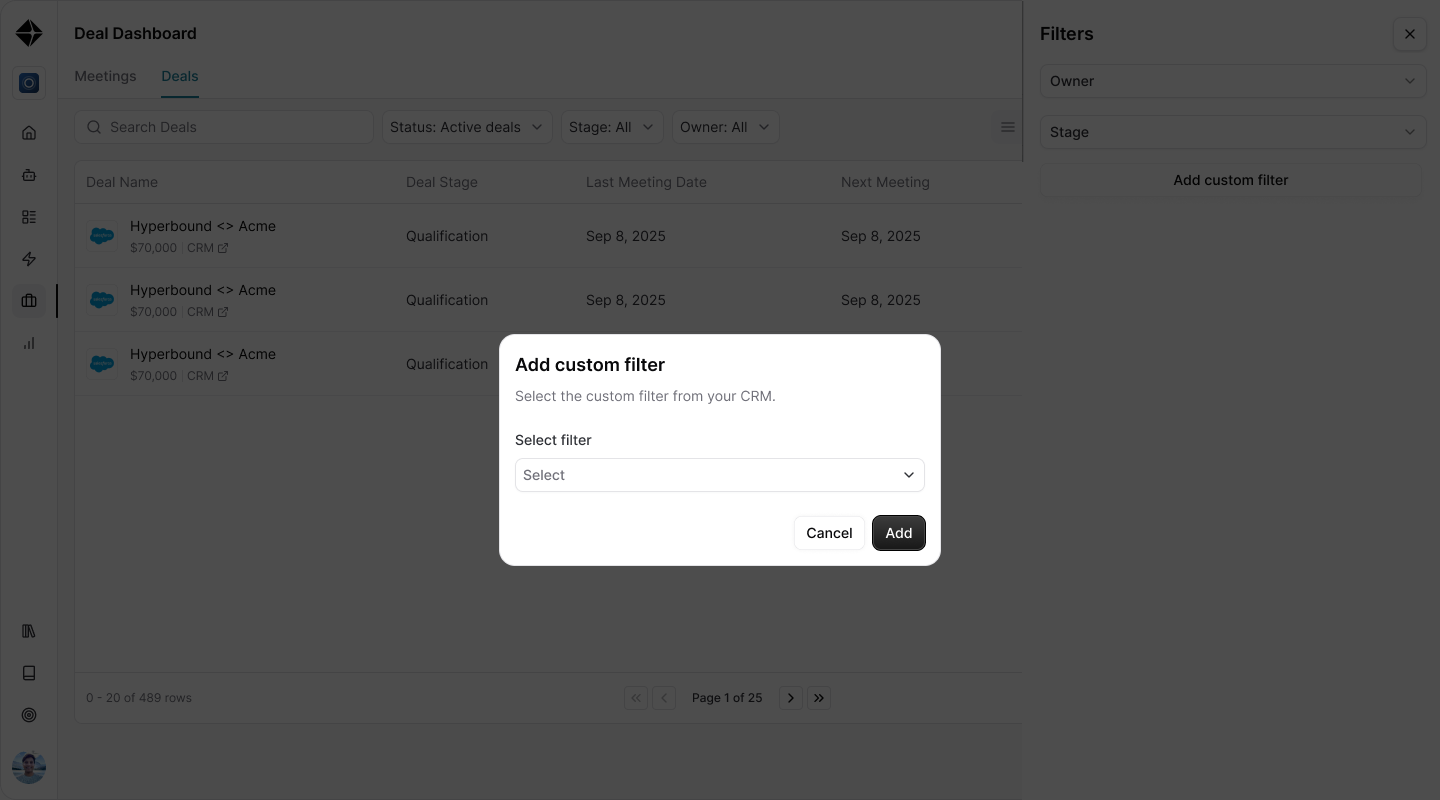
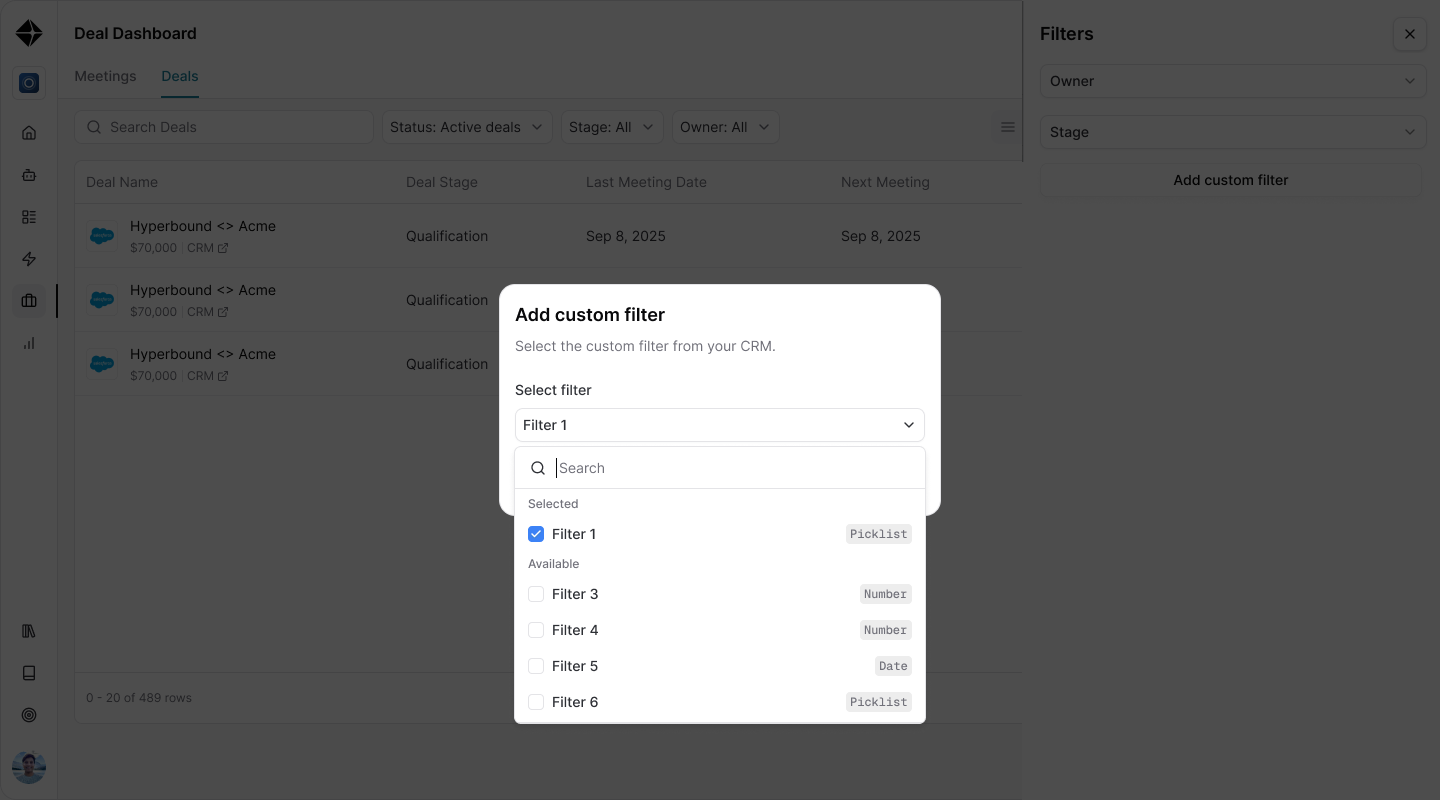
In the Select filter dropdown, choose the CRM property you want to filter by.
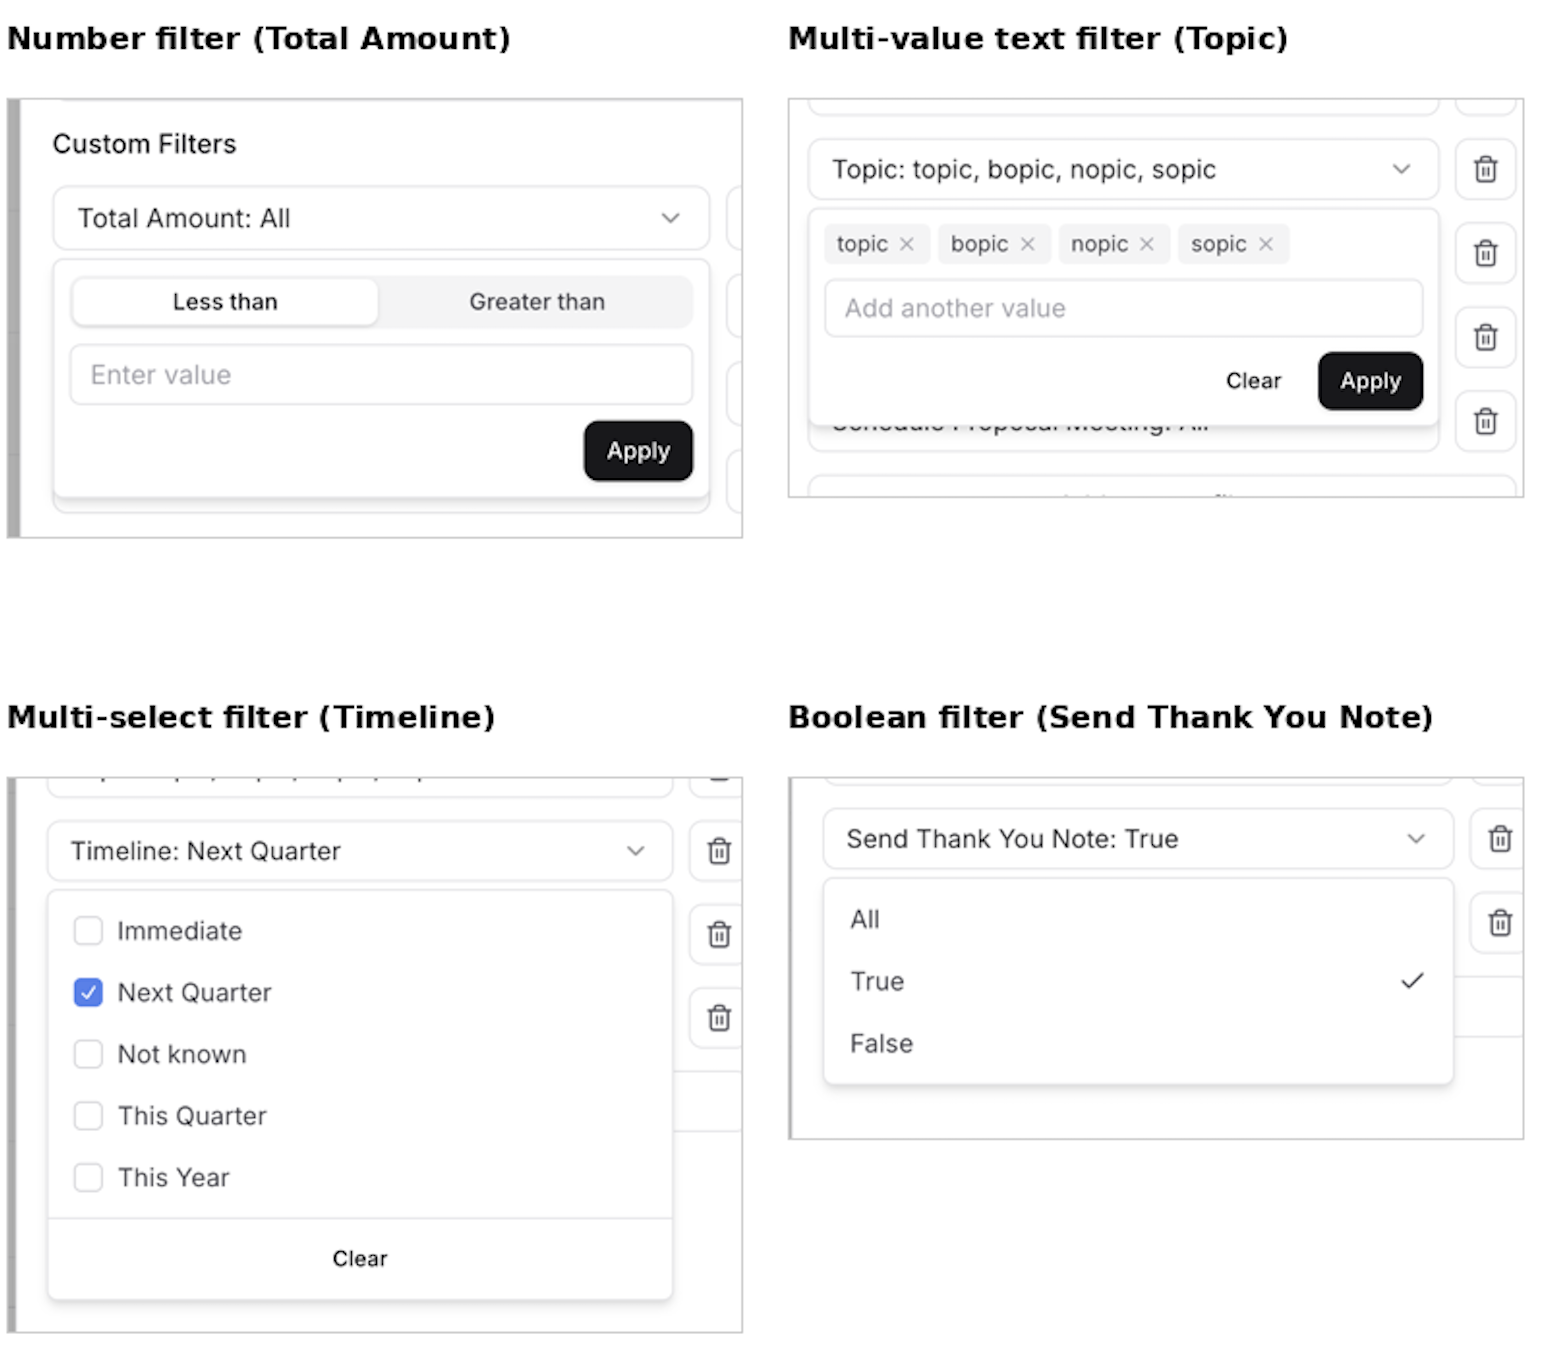
Set the value you would like to filter by. This applies automatically once you set
Custom Filter Types
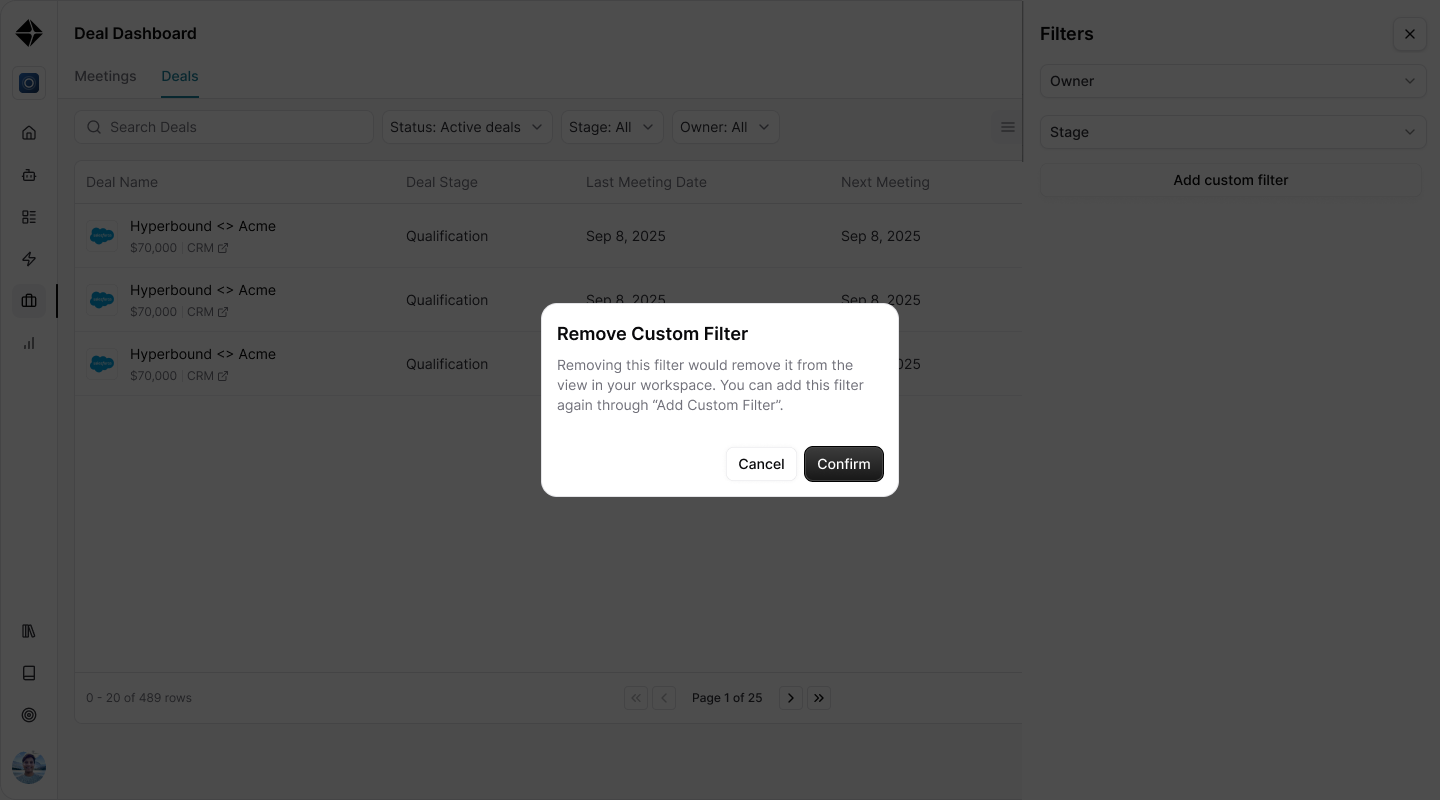
Managing your filters
Add another filter: Click Add custom filter again to stack another condition.
Remove a filter: Click the "x" on the filter you want to clear.
Need Help?
If you have questions, reach out to support@hyperbound.ai
Related Articles