How To: Download and Set Up Live Call Coaching (MacOs)
Last updated: October 9, 2026
Live Call Coaching is a desktop app that coaches you during live calls. It shows battlecards, playbook items, and notes beside your meeting window, so you get the right answer while the call is still happening.
This article covers downloading the app, granting permissions, signing in, connecting your calendar, and choosing your settings.
Once you are set up, see 📄 How To: Use Live Call Coaching as a Rep
Before you start
Live Call Coaching must be turned on for your workspace. It is an add-on. If you do not see it, reach out to your Hyperbound contact.
You need a Mac or Windows computer. This guide is specifically for Mac
You may need admin rights on your computer to install the app. If your company manages your laptop, your IT team may need to install it for you.
Your admin should set up battlecards and playbooks first.
Supported meeting platforms: Zoom, Google Meet, and Microsoft Teams.
Step 1: Download the app
Get the link from your Hyperbound team member
Download the file for your computer:
Mac:
.dmgfileWindows: coming soon
Step 2: Install
Mac
Open the
.dmgfile.Drag Hyperbound into your Applications folder.
Open Hyperbound from Applications.

Note: If your computer blocks the install, you likely need admin rights. Ask your IT team to install the app, or to grant temporary admin access.
Step 3: Grant permissions
The first time you open the app, it asks for a few permissions. Live Call Coaching needs all of them to work.
Permission | Why it is needed |
|---|---|
Microphone | Captures your side of the call |
"Screen Recording" or "Screen & System Audio Recording" | Captures the other side of the call / detects the meeting |
Accessibility | Lets the coaching panel follow your meeting window |
To grant a permission on Mac:
Click Open System Settings when the app asks.
Go to Privacy & Security
Scroll down and select open anyway to open Hyperbound.
If prompted, quit and reopen the app.
Tip: If coaching does not start later, a missing permission is the most common cause. Check all three are on.
Step 4: Sign in
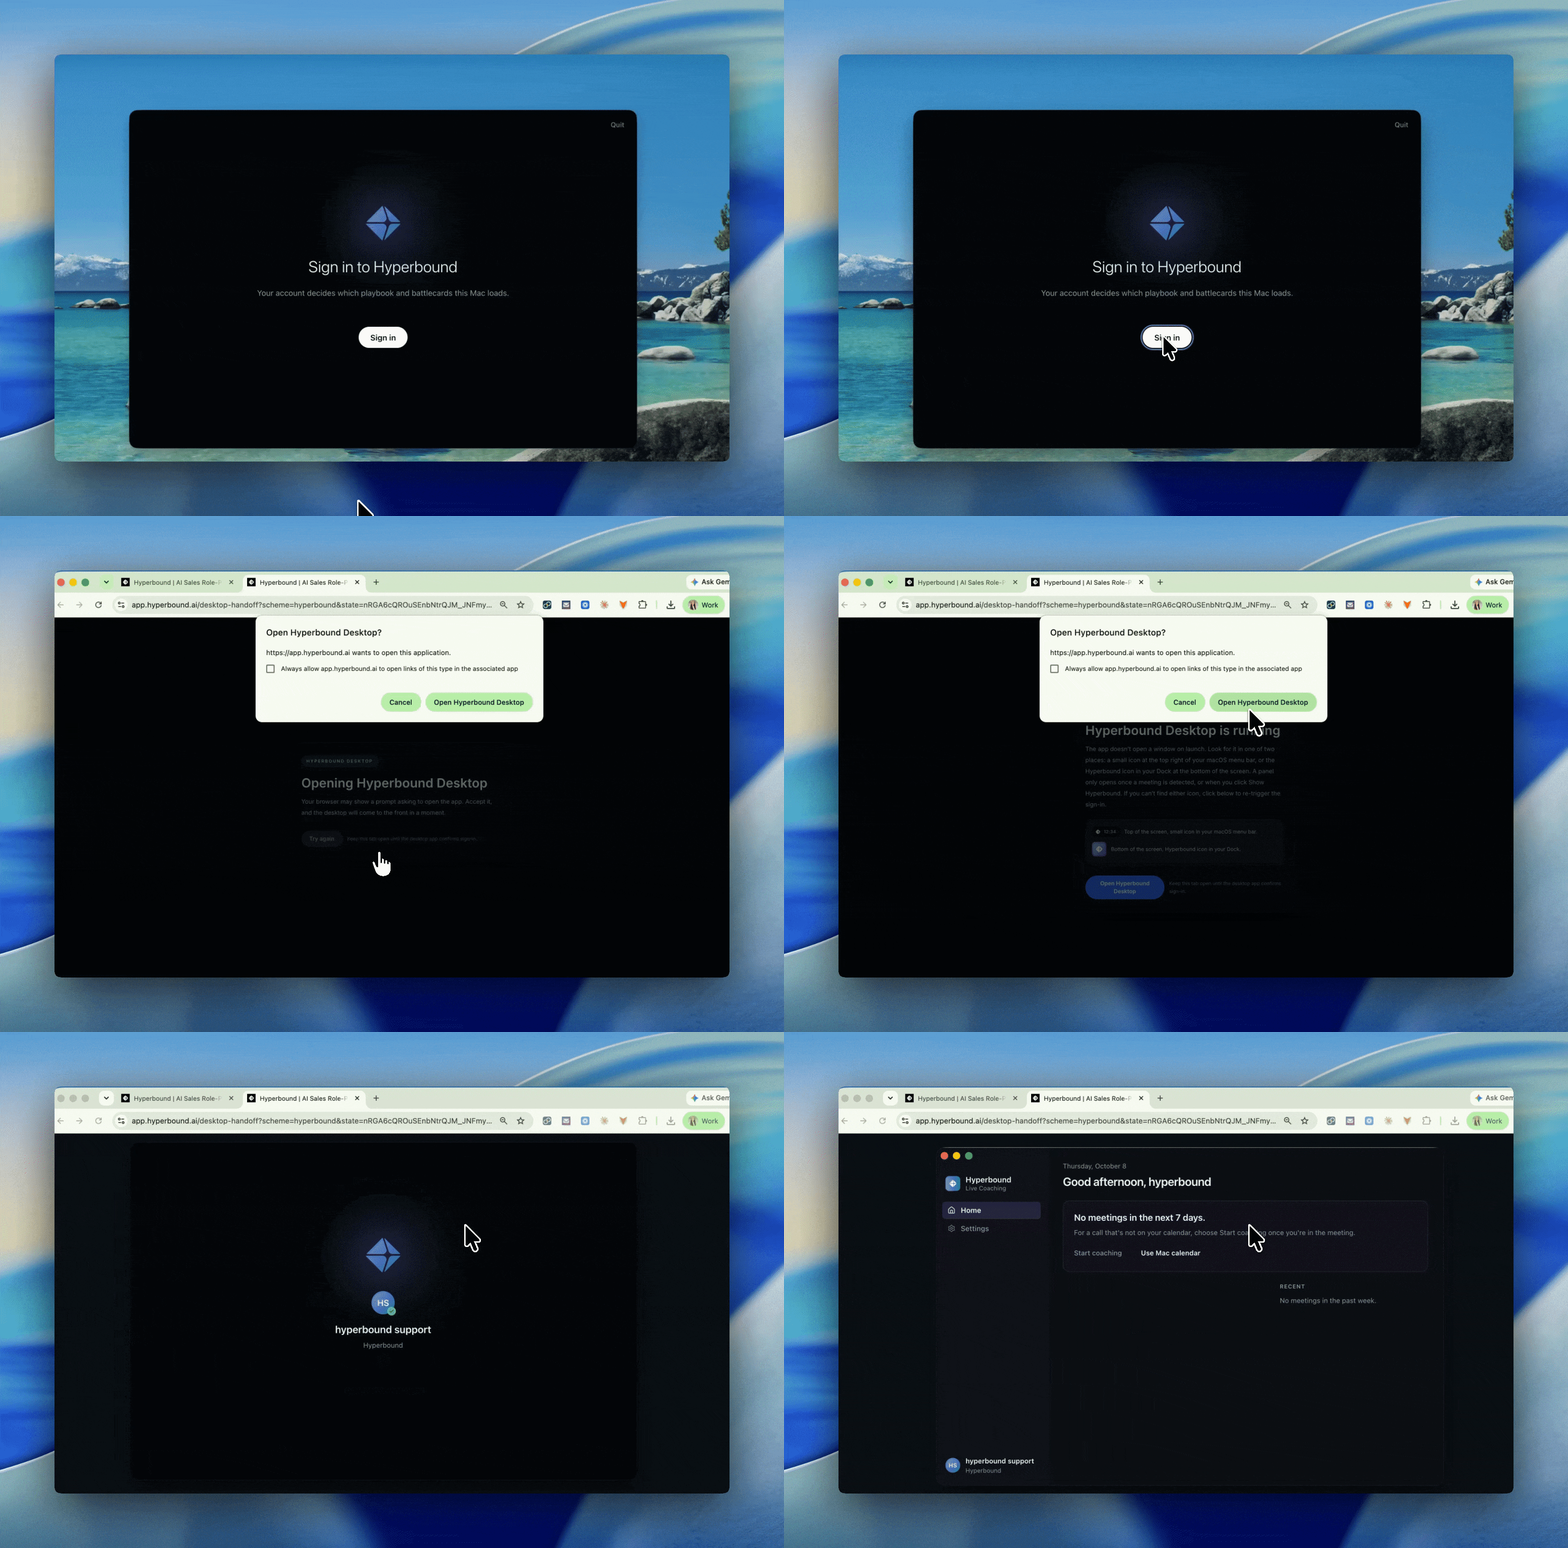
In the app, click Sign In
Sign in with the same account you use for Hyperbound on the web, including SSO. If you are already signed in, Hyperbound will detect that and log you in automatically
If you belong to more than one workspace, make sure you are signed into to the correct org before selecting Sign In.
Step 5: Connect your calendar
Connecting your calendar puts your upcoming meetings in the app, so you can start coaching with one click.
Settings > Calendar
Choose Google Calendar, Outlook Calendar, or Mac Calendar
Sign in and allow access.
Choose frequency of refresh and check for upcoming meetings
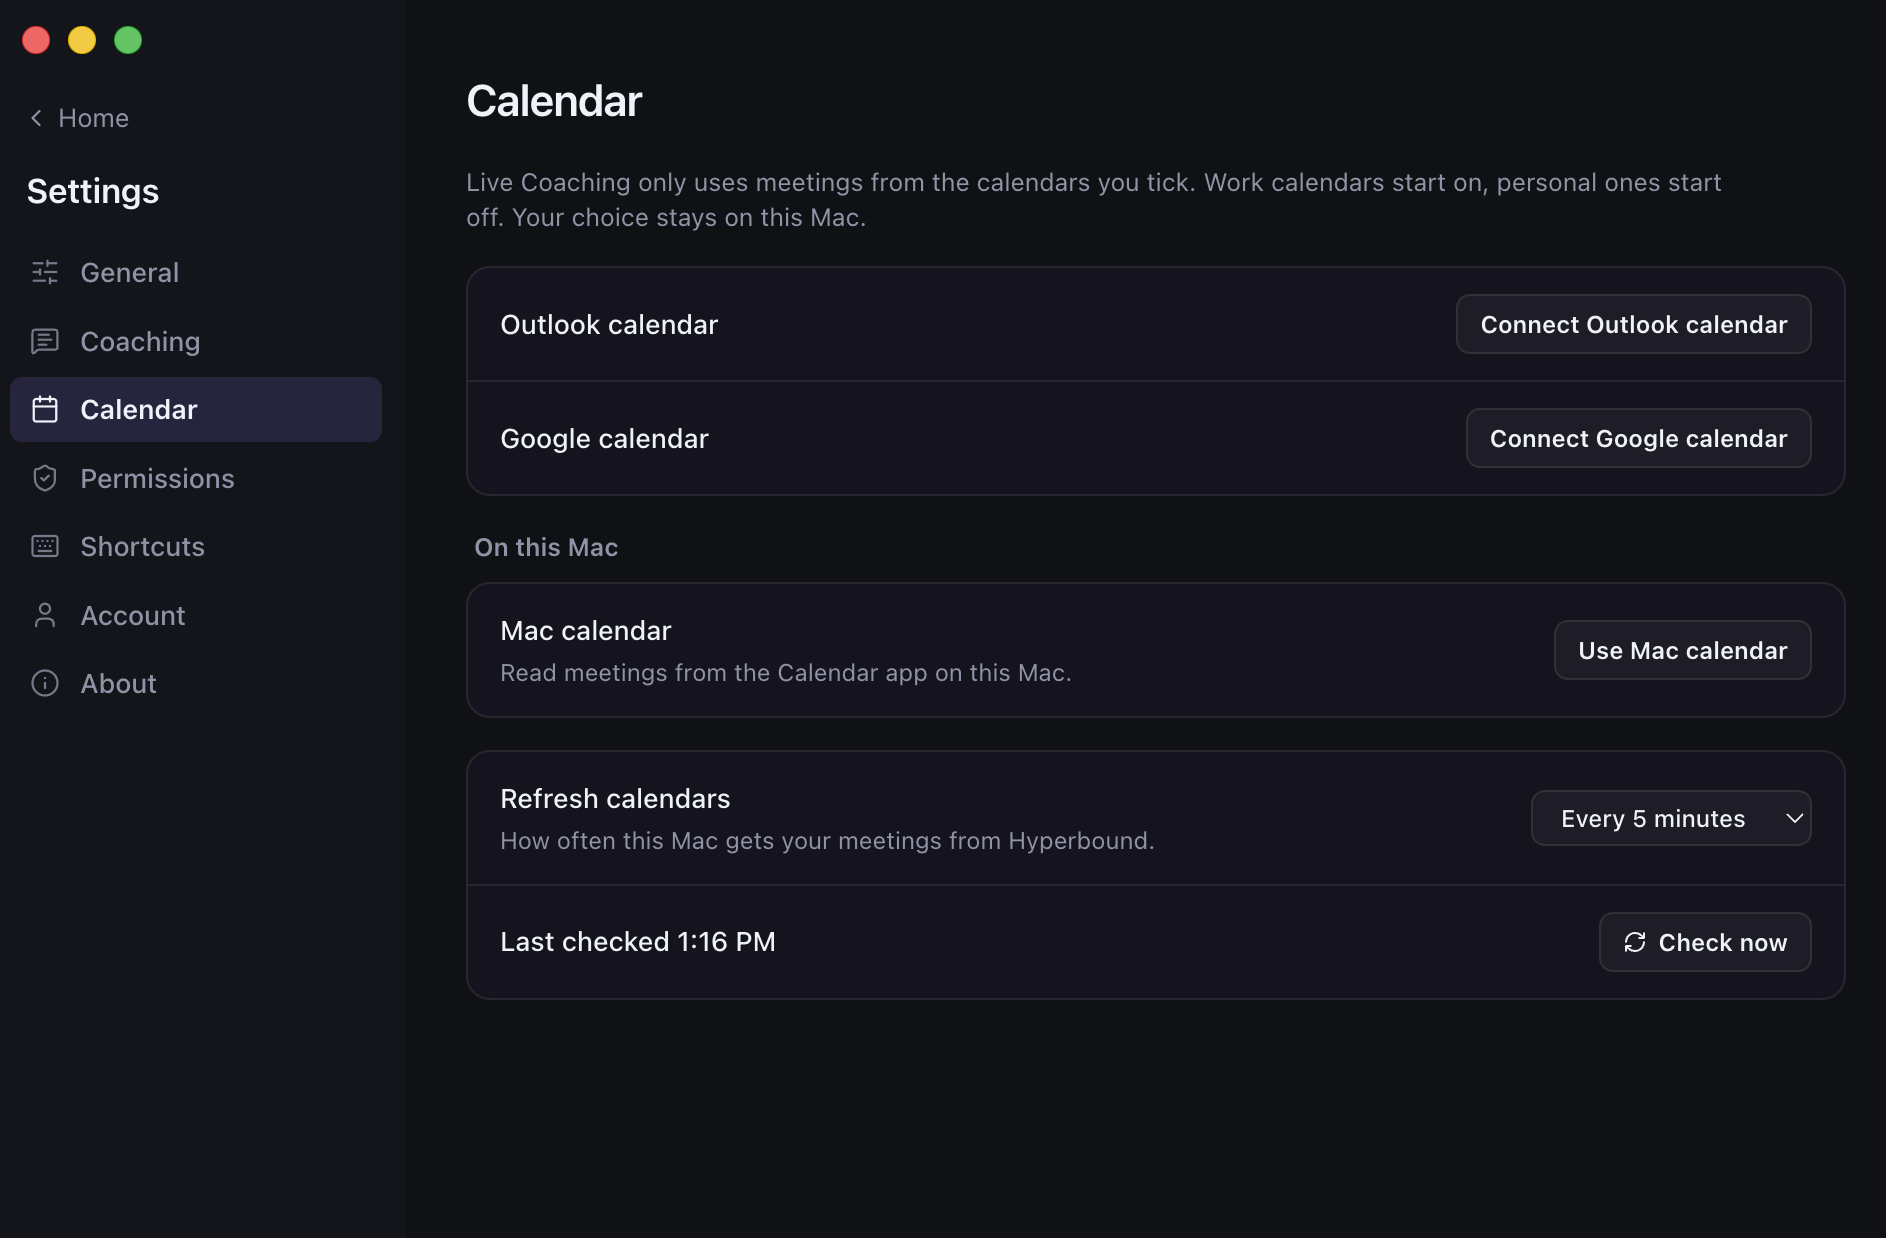
Your upcoming meetings now appear in the meeting tray. Click Join with coaching
Step 6: Choose your settings
Shortcuts
Set keyboard shortcuts for Pause coaching and Help. Both are off until you set one.
Coaching
AI suggestions coming up too frequently? Set Coaching > Suggestion Frequency to Less
Calendar and Permissions
Calendar: connect or reconnect Google or Outlook. See Step 5.
Permissions: check that Microphone, Screen Recording, and Accessibility are on. See Step 3.
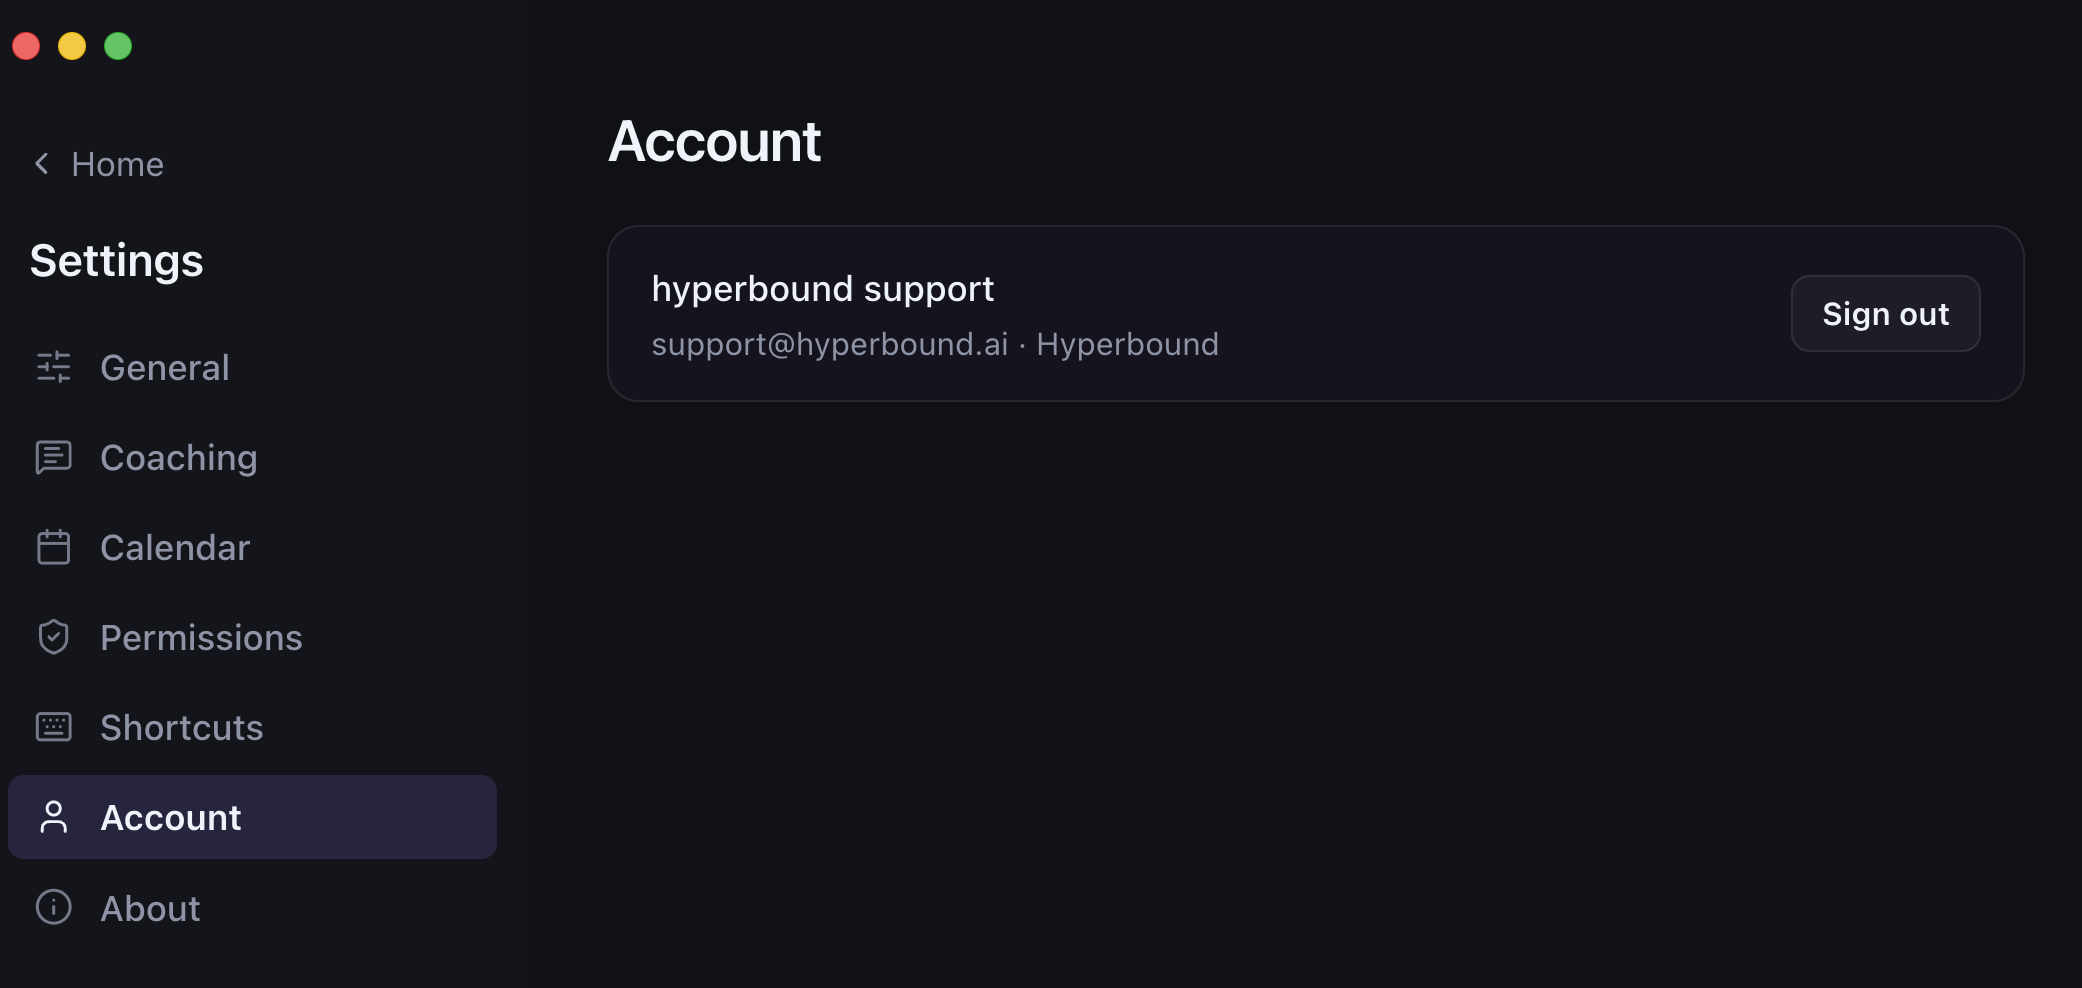
Account
Shows the name, email, and workspace you are signed into. Click Sign out to switch accounts.
Troubleshooting
What you see | What to do |
|---|---|
Install is blocked | You need admin rights. Ask your IT team. |
Coaching does not start | Check Microphone, Screen Recording, and Accessibility are on. Then quit and reopen the app. |
No battlecards appear when testing alone | Turn on Solo Speaker Mode before the call. |
Top of the panel looks cut off | Stop coaching and start again. |
No meetings in the tray | Reconnect your calendar. |
App says Live Call Coaching is not available | Not turned on for your workspace yet. Contact your Hyperbound rep. |
Related articles
Have more questions? Reach out to help@hyperbound.ai