Workday Integration: Enrich User Attributes
Last updated: July 1, 2026
Connect Workday to Hyperbound to automatically enrich your members attributes with employee data like name, email, department, and region.
Prerequisites
Must be an admin in Hyperbound
Help of your Workday admin to set the field scope and authorize the connection
An active Hyperbound workspace with members already invited (via manual invite or SSO/SCIM)
This integration enriches existing users. It does not create or invite users. Invites still happen through manual invite in the Hyperbound UI, or through SSO/SCIM if that is set up.
Reach out to the support team to enable the Workday integration for your workspace.
What data Hyperbound reads
Read-only Hyperbound only requests read permission on Workday data. We never write anything in Workday.
Basic employee info only We read fields like name, email, department, and region
You control the scope The exact set of fields shared is configured by your Workday admin, so your team decides what Hyperbound can see.
Connection method Hyperbound connects to Workday via a Refresh Token.
Sync Updates are automatic and near real-time. There is nothing to sync manually.
#1 Register an API client in Workday
This step is done by your Workday administrator.
Ask your Workday admin to register an API Client for Integrations with:
They will end up with the values you need in Step 3: Token Domain, Tenant, Client ID, Client Secret, and Refresh Token.
#2 Open the Workday integration in Hyperbound
Click on bottom left corner and select Workspace Settings
Go to Integrations in Hyperbound
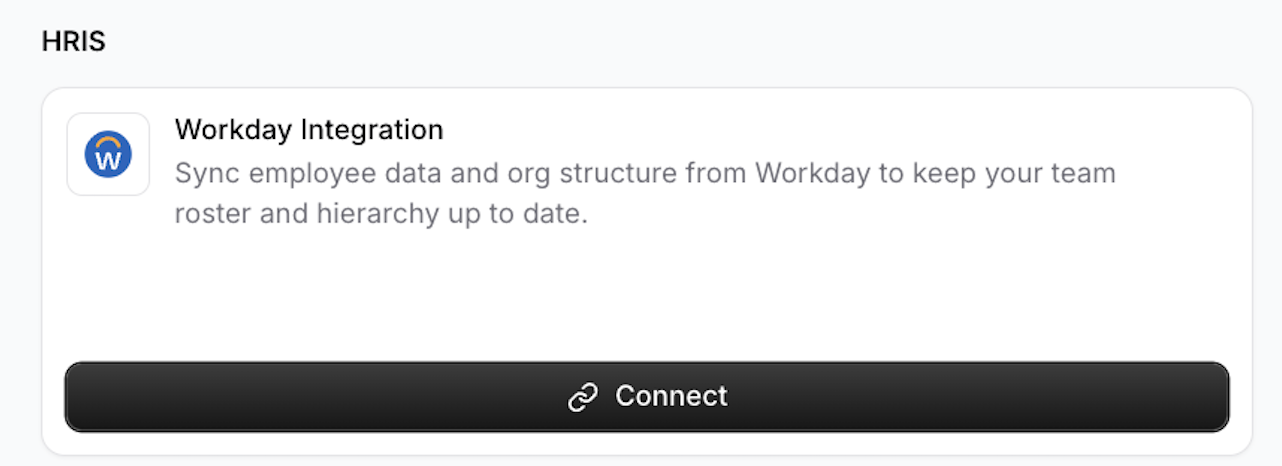
Find Workday and click Connect to open the New Workday Integration form
#3 Fill in the connection details
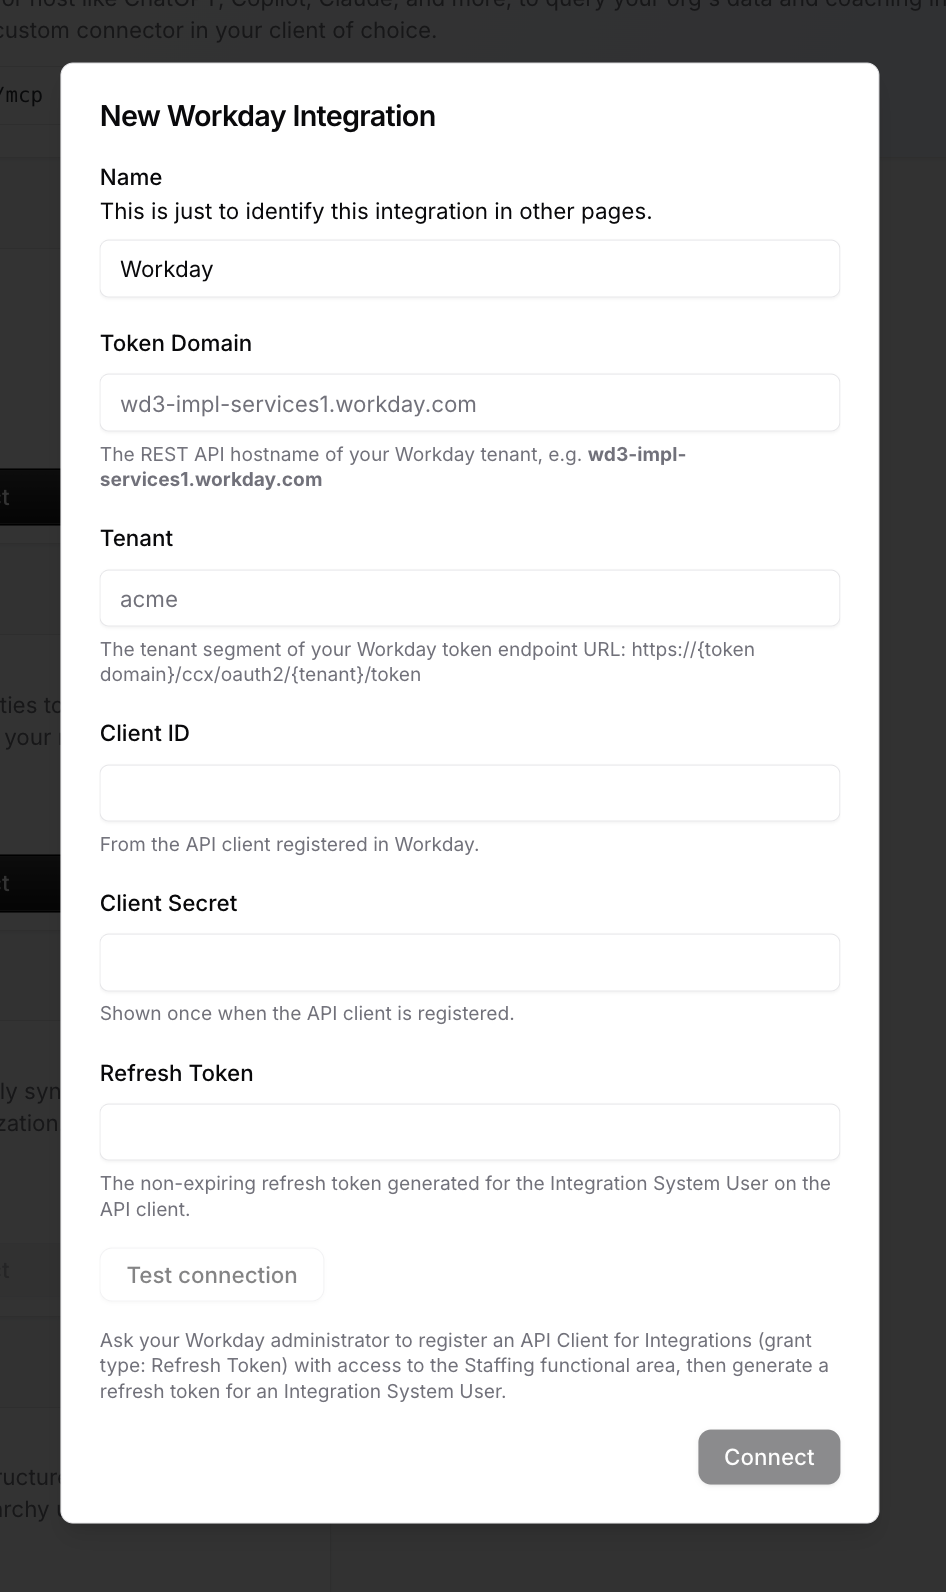
Enter the values from Step 1:
Name — Any label to identify this integration in other pages. For example,
Workday.Token Domain — The REST API hostname of your Workday tenant. For example,
wd3-impl-services1.workday.com.Tenant — The tenant segment of your Workday token endpoint URL:
https://{token domain}/ccx/oauth2/{tenant}/token. For example,acme.Client ID — From the API client registered in Workday.
Client Secret — Shown once when the API client is registered.
Refresh Token — The non-expiring refresh token generated for the Integration System User on the API client.
Instructions:
Step 1: Finding your Token Domain
Log in to your Workday instance.
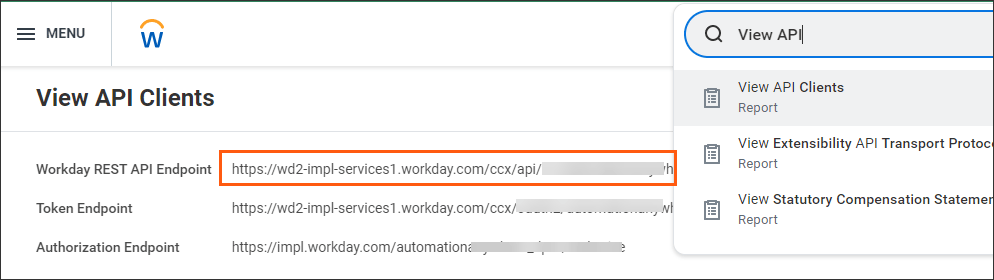
In your Workday homepage, go to the search bar and type View API Clients then select it.
You can locate your Token Domain within the Token Endpoint field.
The Token Domain is everything after
https://and beforeccx.
Example: If the endpoint is
https://wd2-impl-services1.workday.com/ccx/oauth2/acme/token, your Token Domain iswd2-impl-services1.workday.com.
Step 2: Finding your Tenant
In the same Token Endpoint field from the View API Clients report, the Tenant is the final part of the URL after
/oauth2/and before/token.
Example: If the endpoint is
https://wd2-impl-services1.workday.com/ccx/oauth2/acme/token, your Tenant isacme.
Step 3: Registering an API Client
Navigate to Register API Client for integration in your Workday instance
Click Register API Client for Integrations
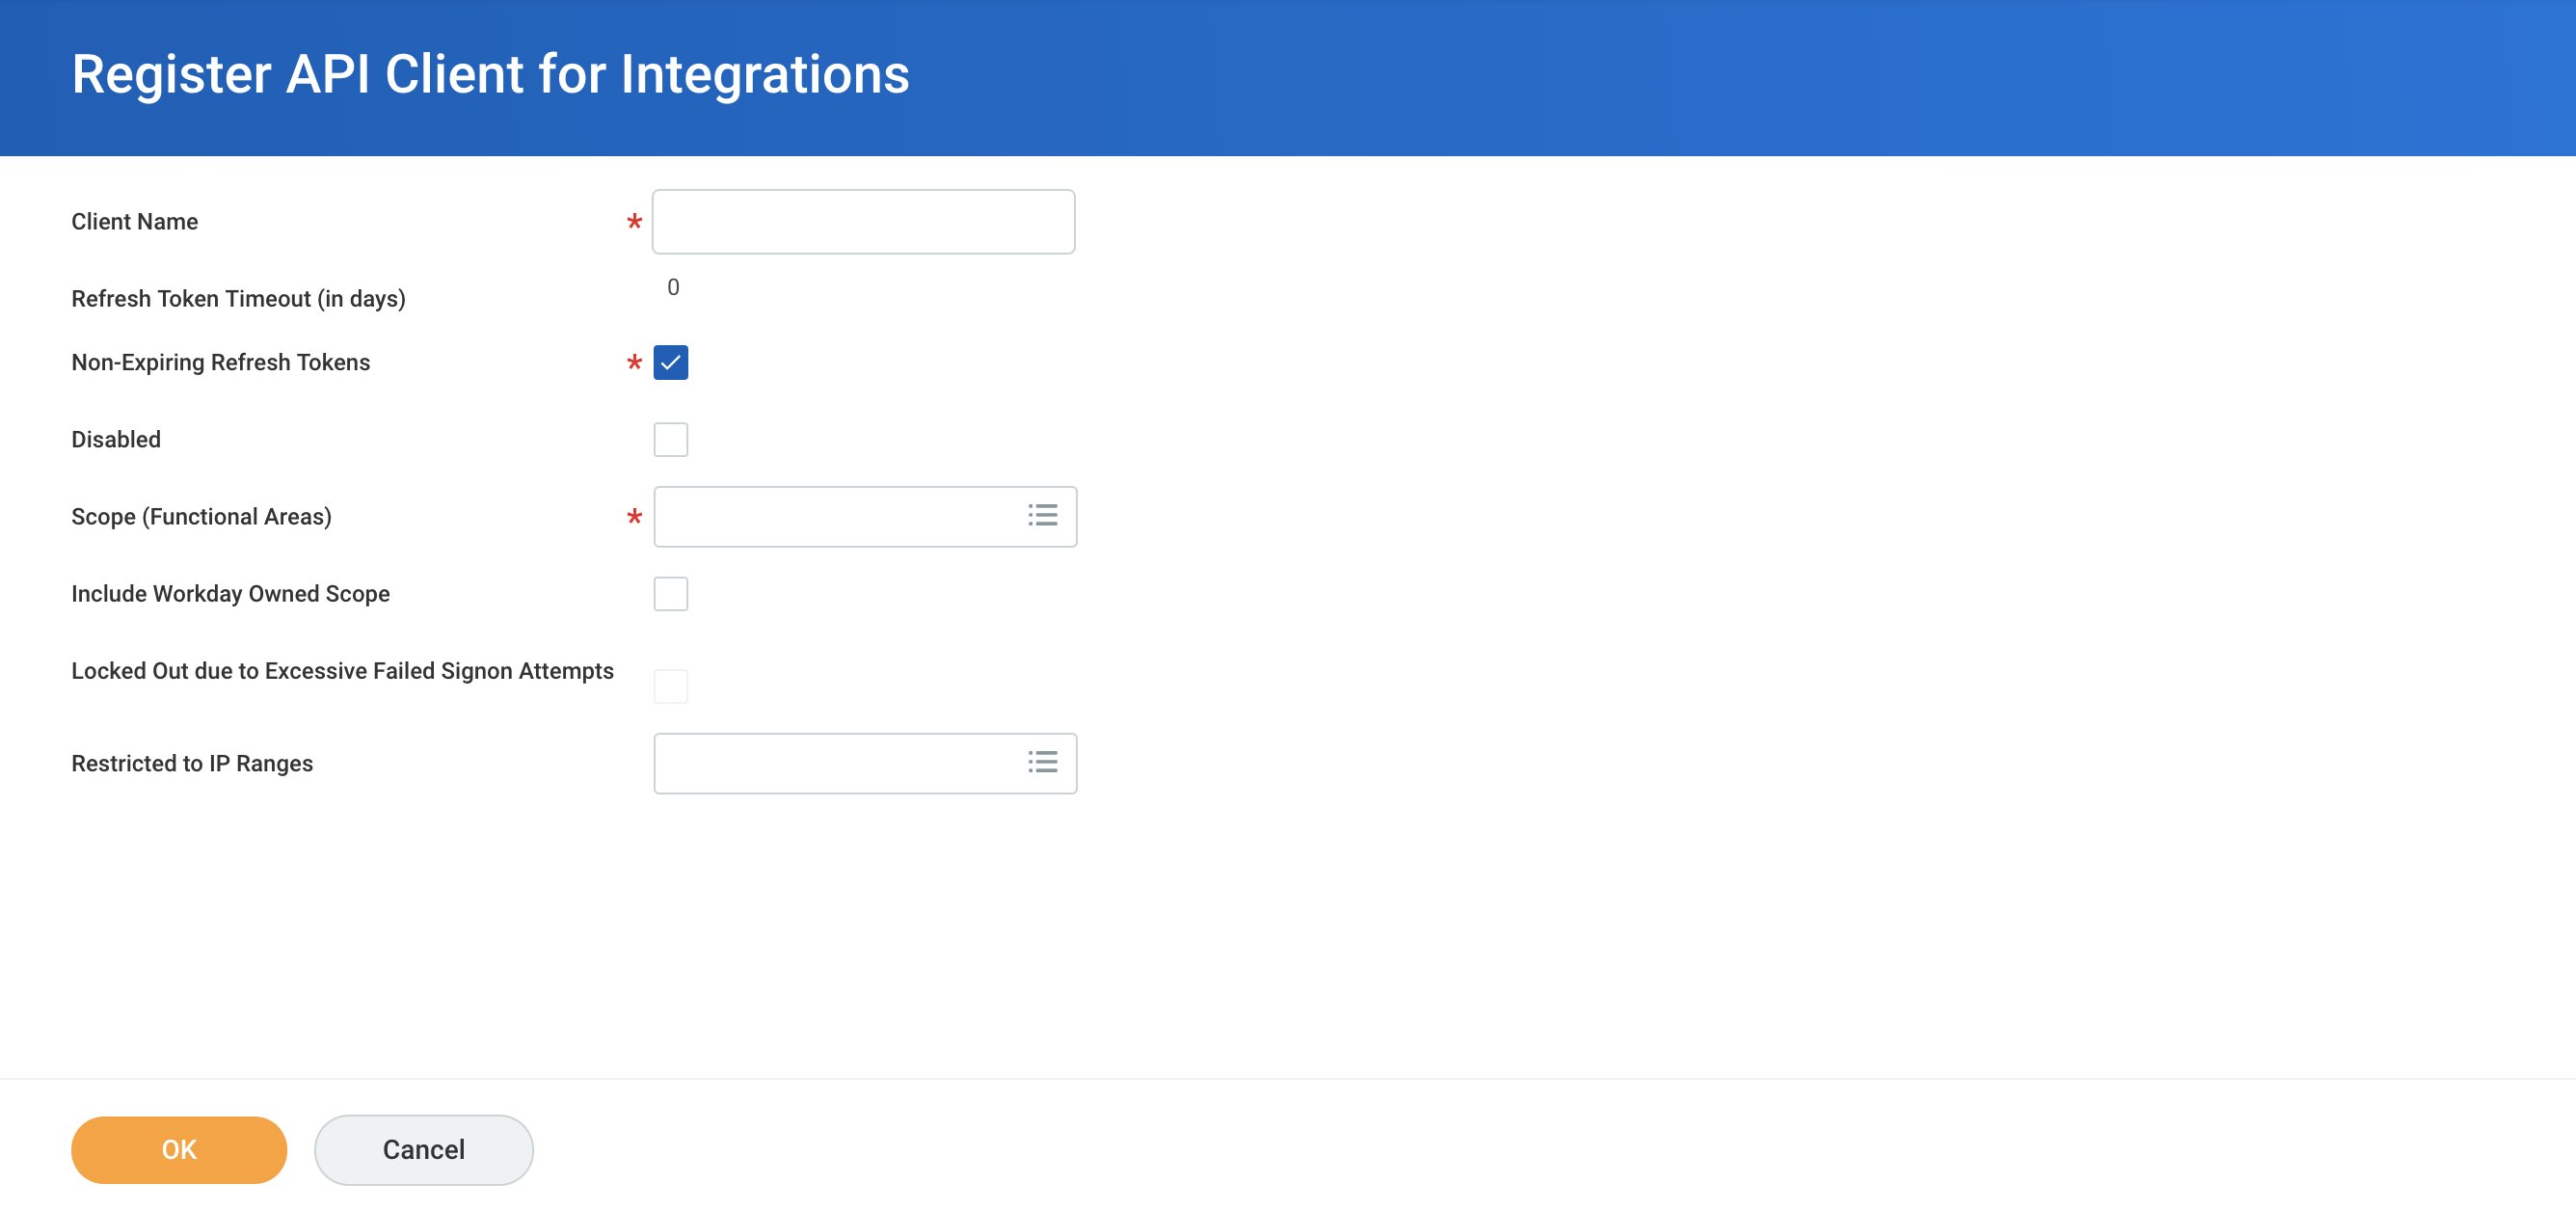
Enter a meaningful name to indicate that this API client is used for your integration (e.g., “Nango Integration”)
Select Non-Expiring Refresh Tokens to ensure long lived access
Select all the OAuth2 scopes and Functional Area scopes that you need for the recipes you intend to create
Save the Client ID and Client Secret before clicking Done. These will be required to create a Workday connection
Step 4: Generating a Refresh Token
After registering your API client, you need to generate a refresh token for your Integration System User (ISU).
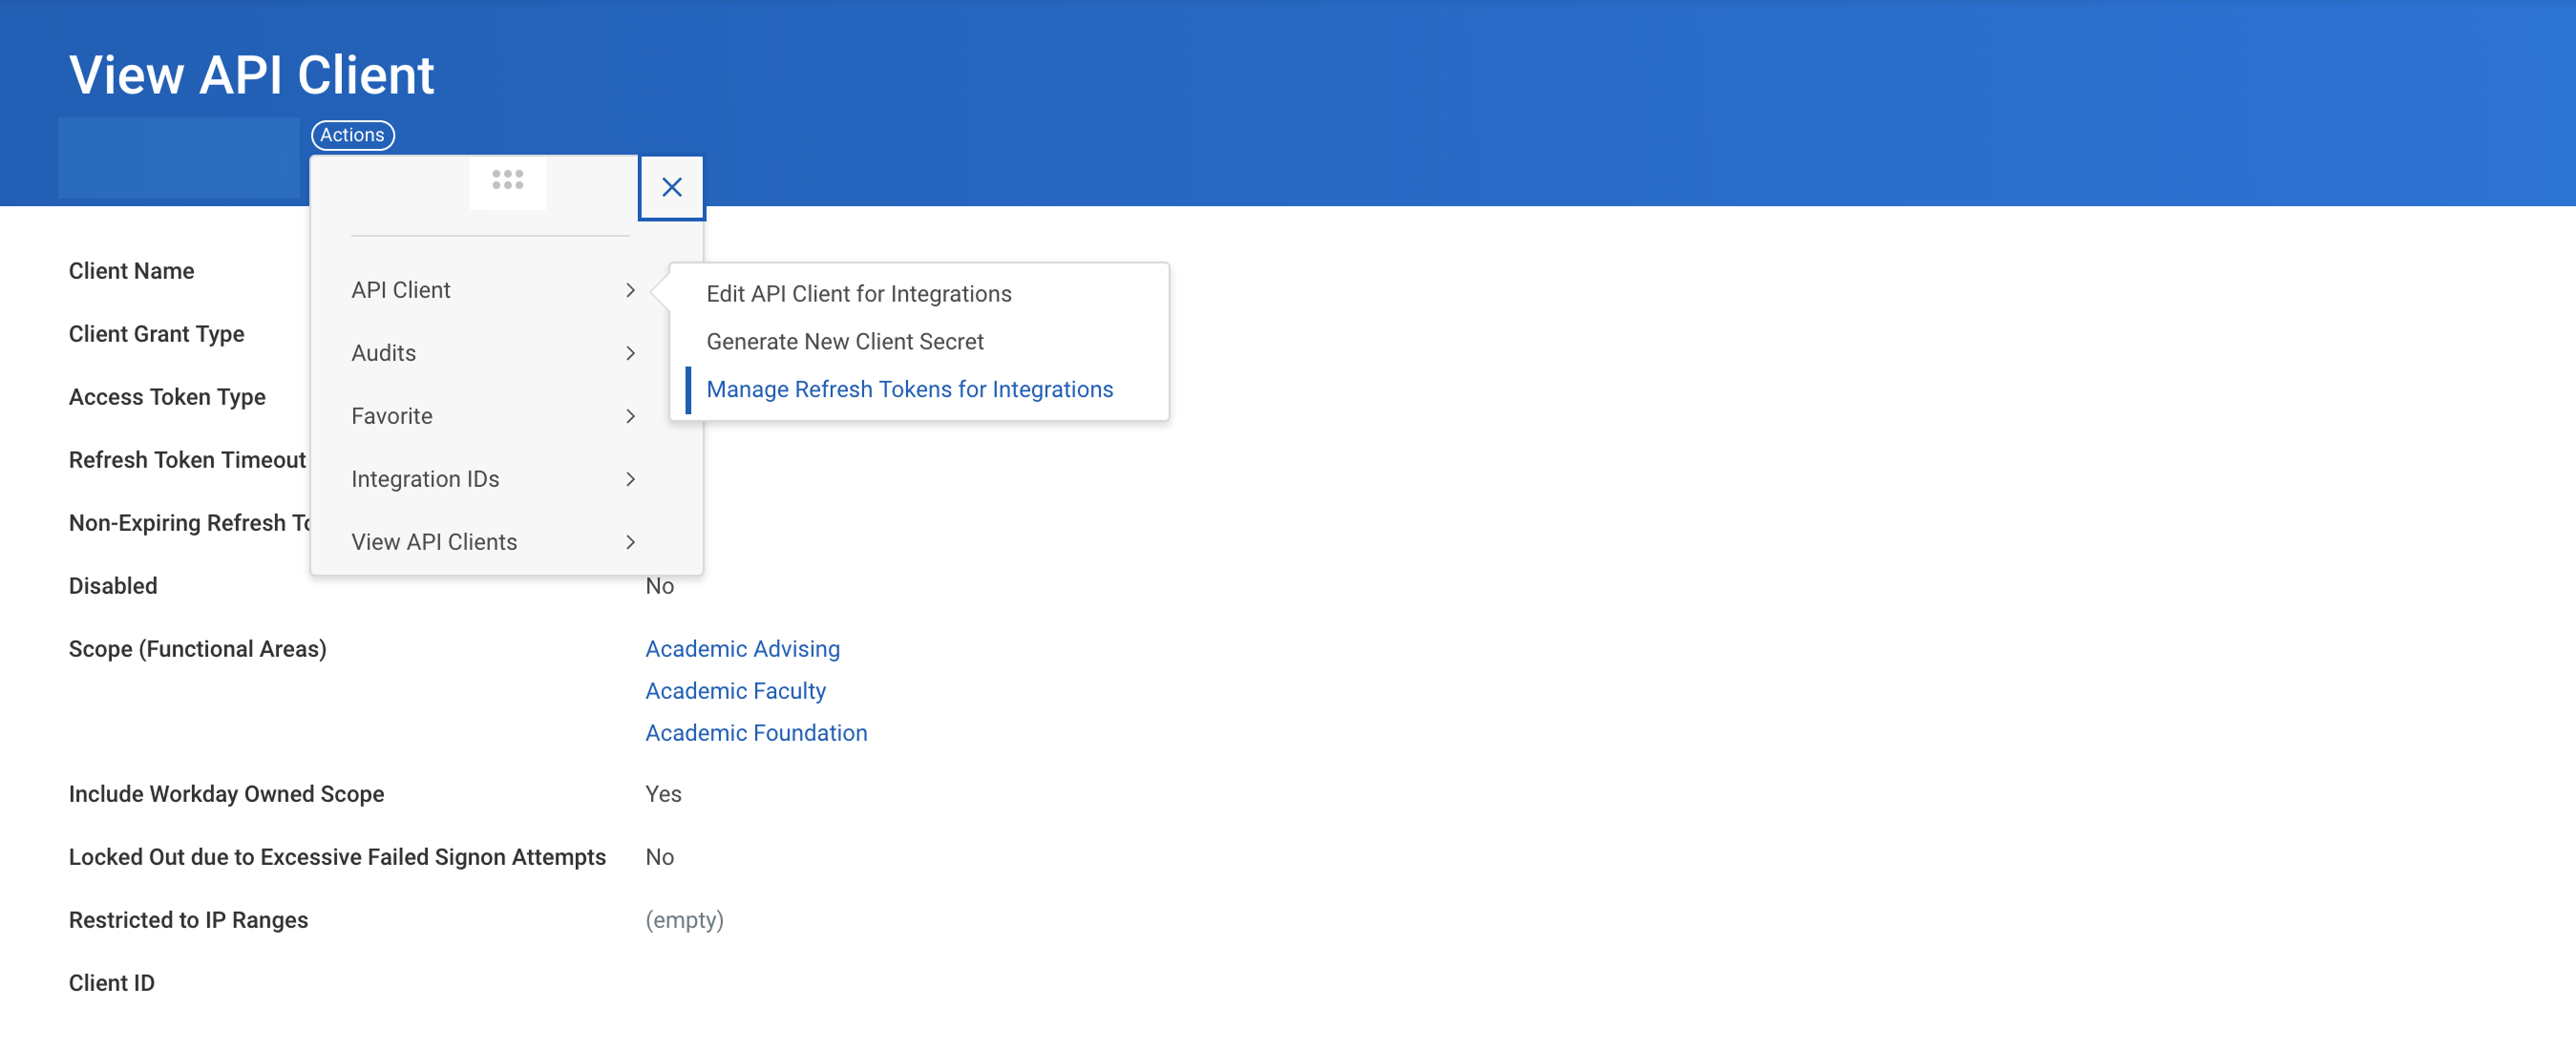
Navigate to Action > API Client > Manage Refresh Tokens for Integrations
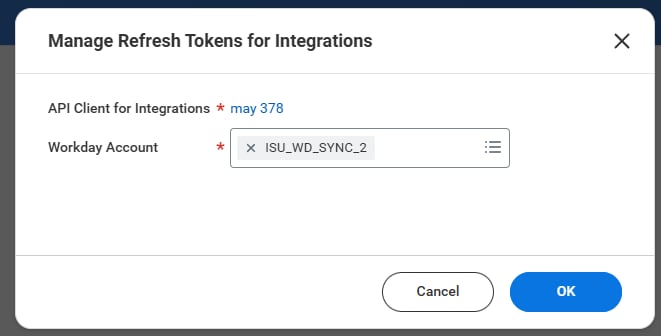
Select the Integration System User (ISU) to perform all integration actions
If there are no existing refresh tokens, select Generate new refresh token
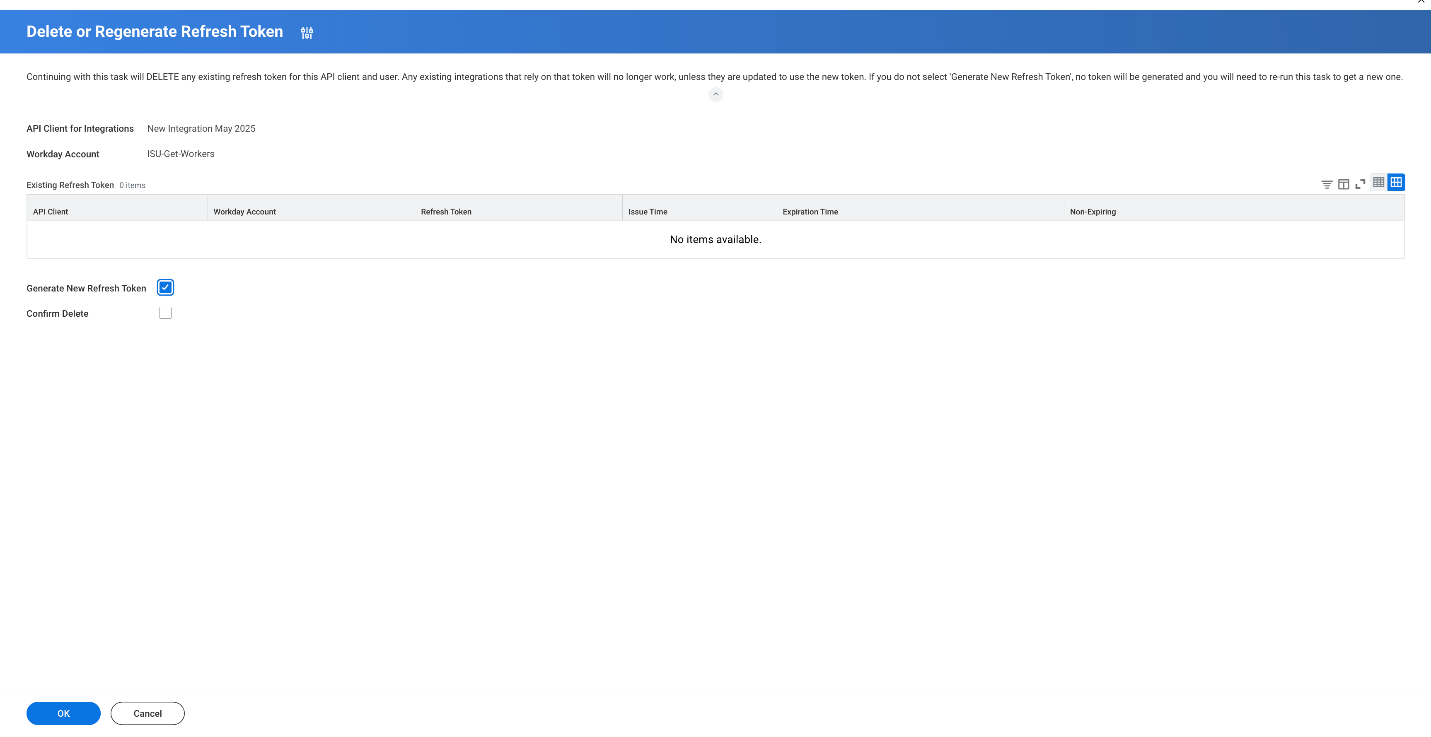
Copy the new Refresh Token - this will be required to create a Workday connection
Step 5: Enter credentials in the Connect UI
Once you have your Token Domain, Tenant, Client ID, Client Secret, and Refresh Token:
Open the form where you need to authenticate with Workday (Refresh Token)
Enter your Token Domain, Tenant, Client ID, Client Secret, and Refresh Token in their respective fields.
Submit the form, and you should be successfully authenticated
#4 Test and connect
Click Test connection to confirm the credentials work.
Once the test passes, click Connect.
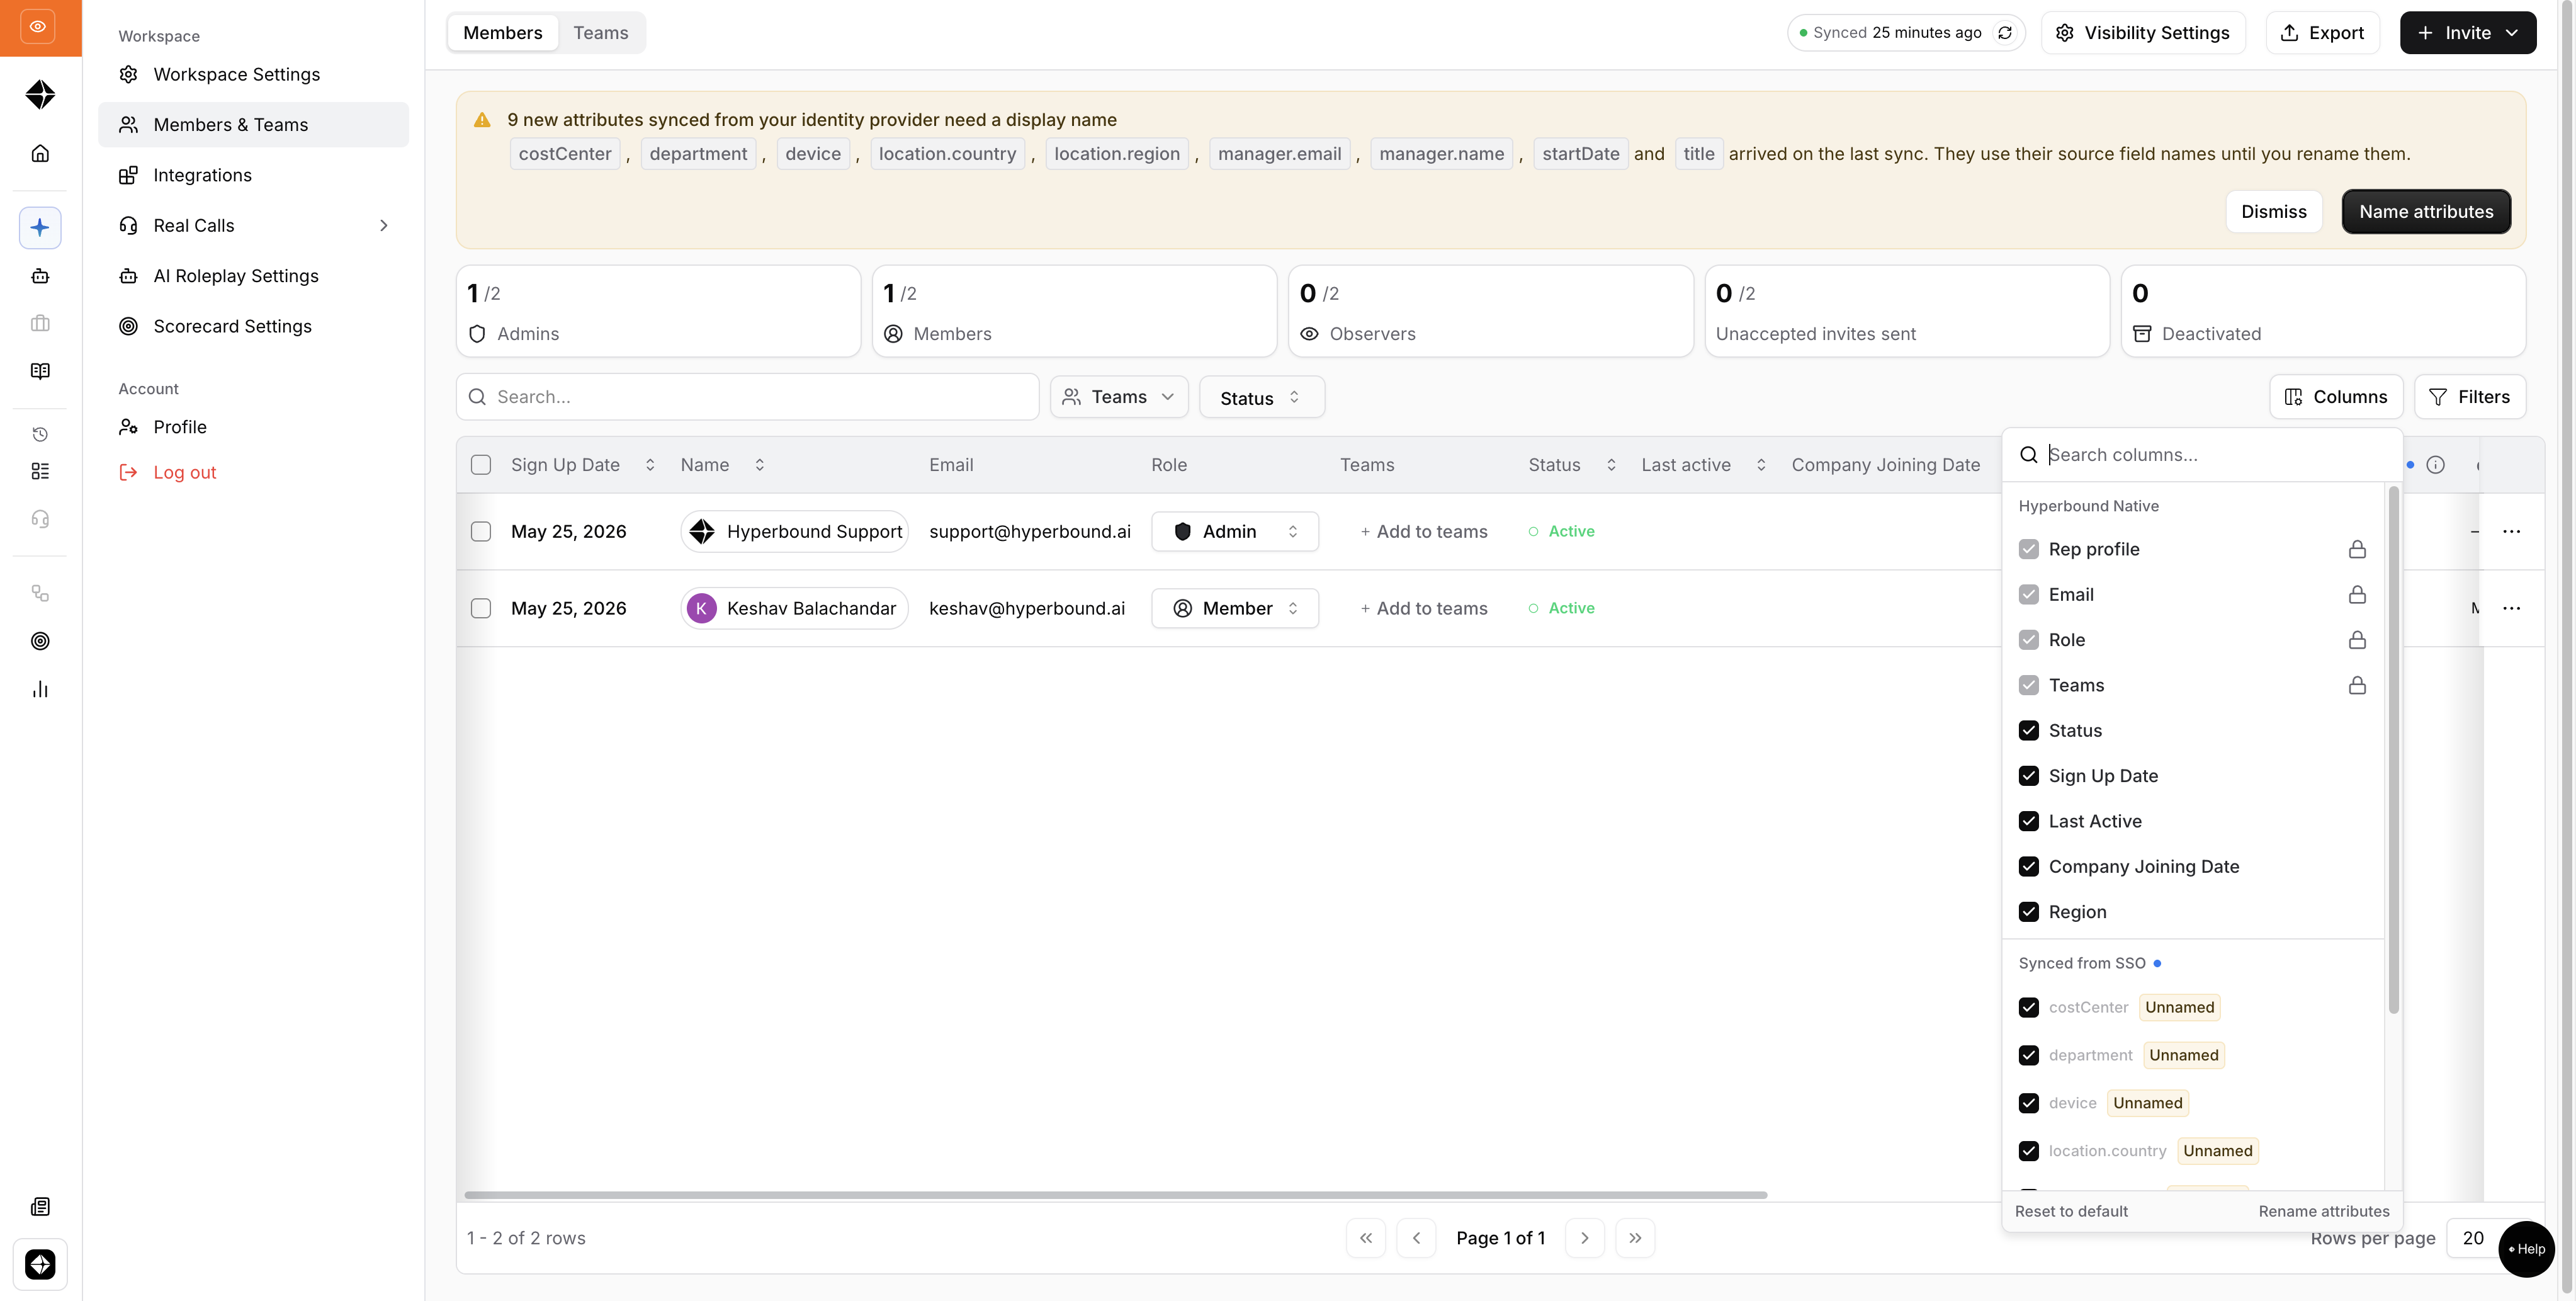
Where the attributes appear
Workday attributes show up on the Members page, separate from Hyperbound's native attributes. This works the same way as attributes ingested from SSO.
Good to know
The Workday integration enriches existing members. It does not provision or invite users.
Invites continue to come from manual invite in the UI, or SSO/SCIM if configured.
Hyperbound never writes back to Workday.
No salary or other sensitive data is read.